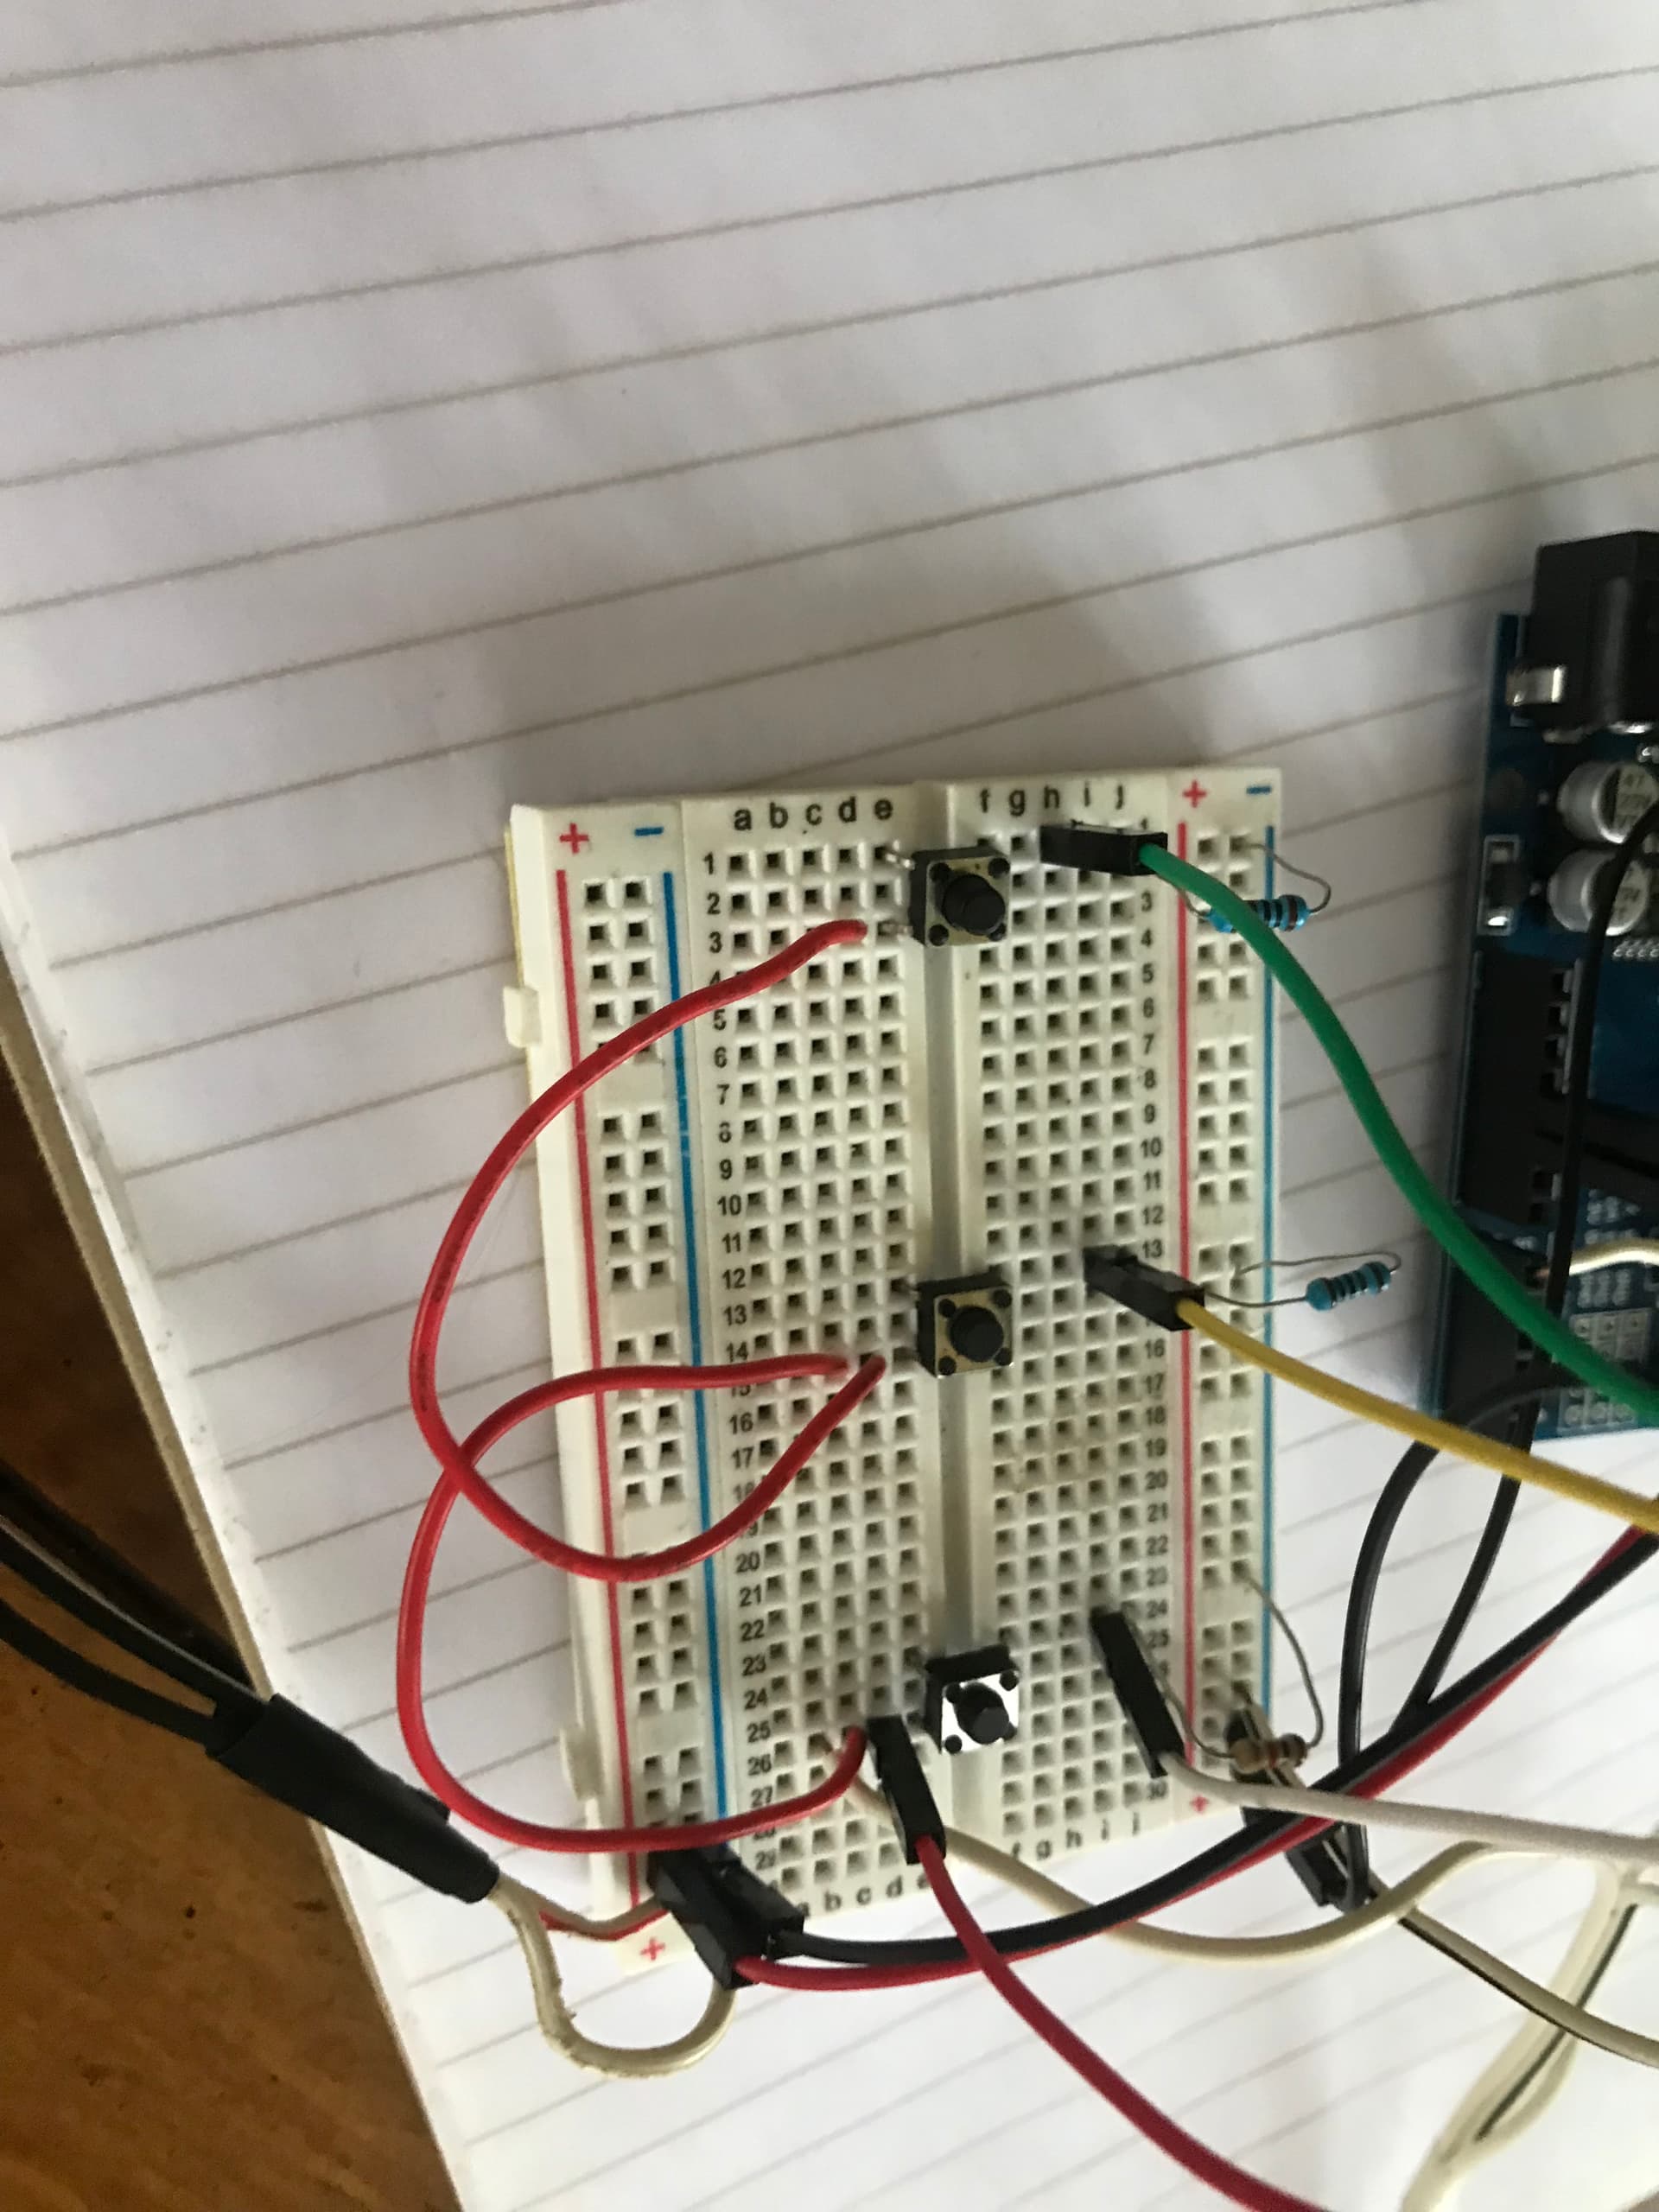
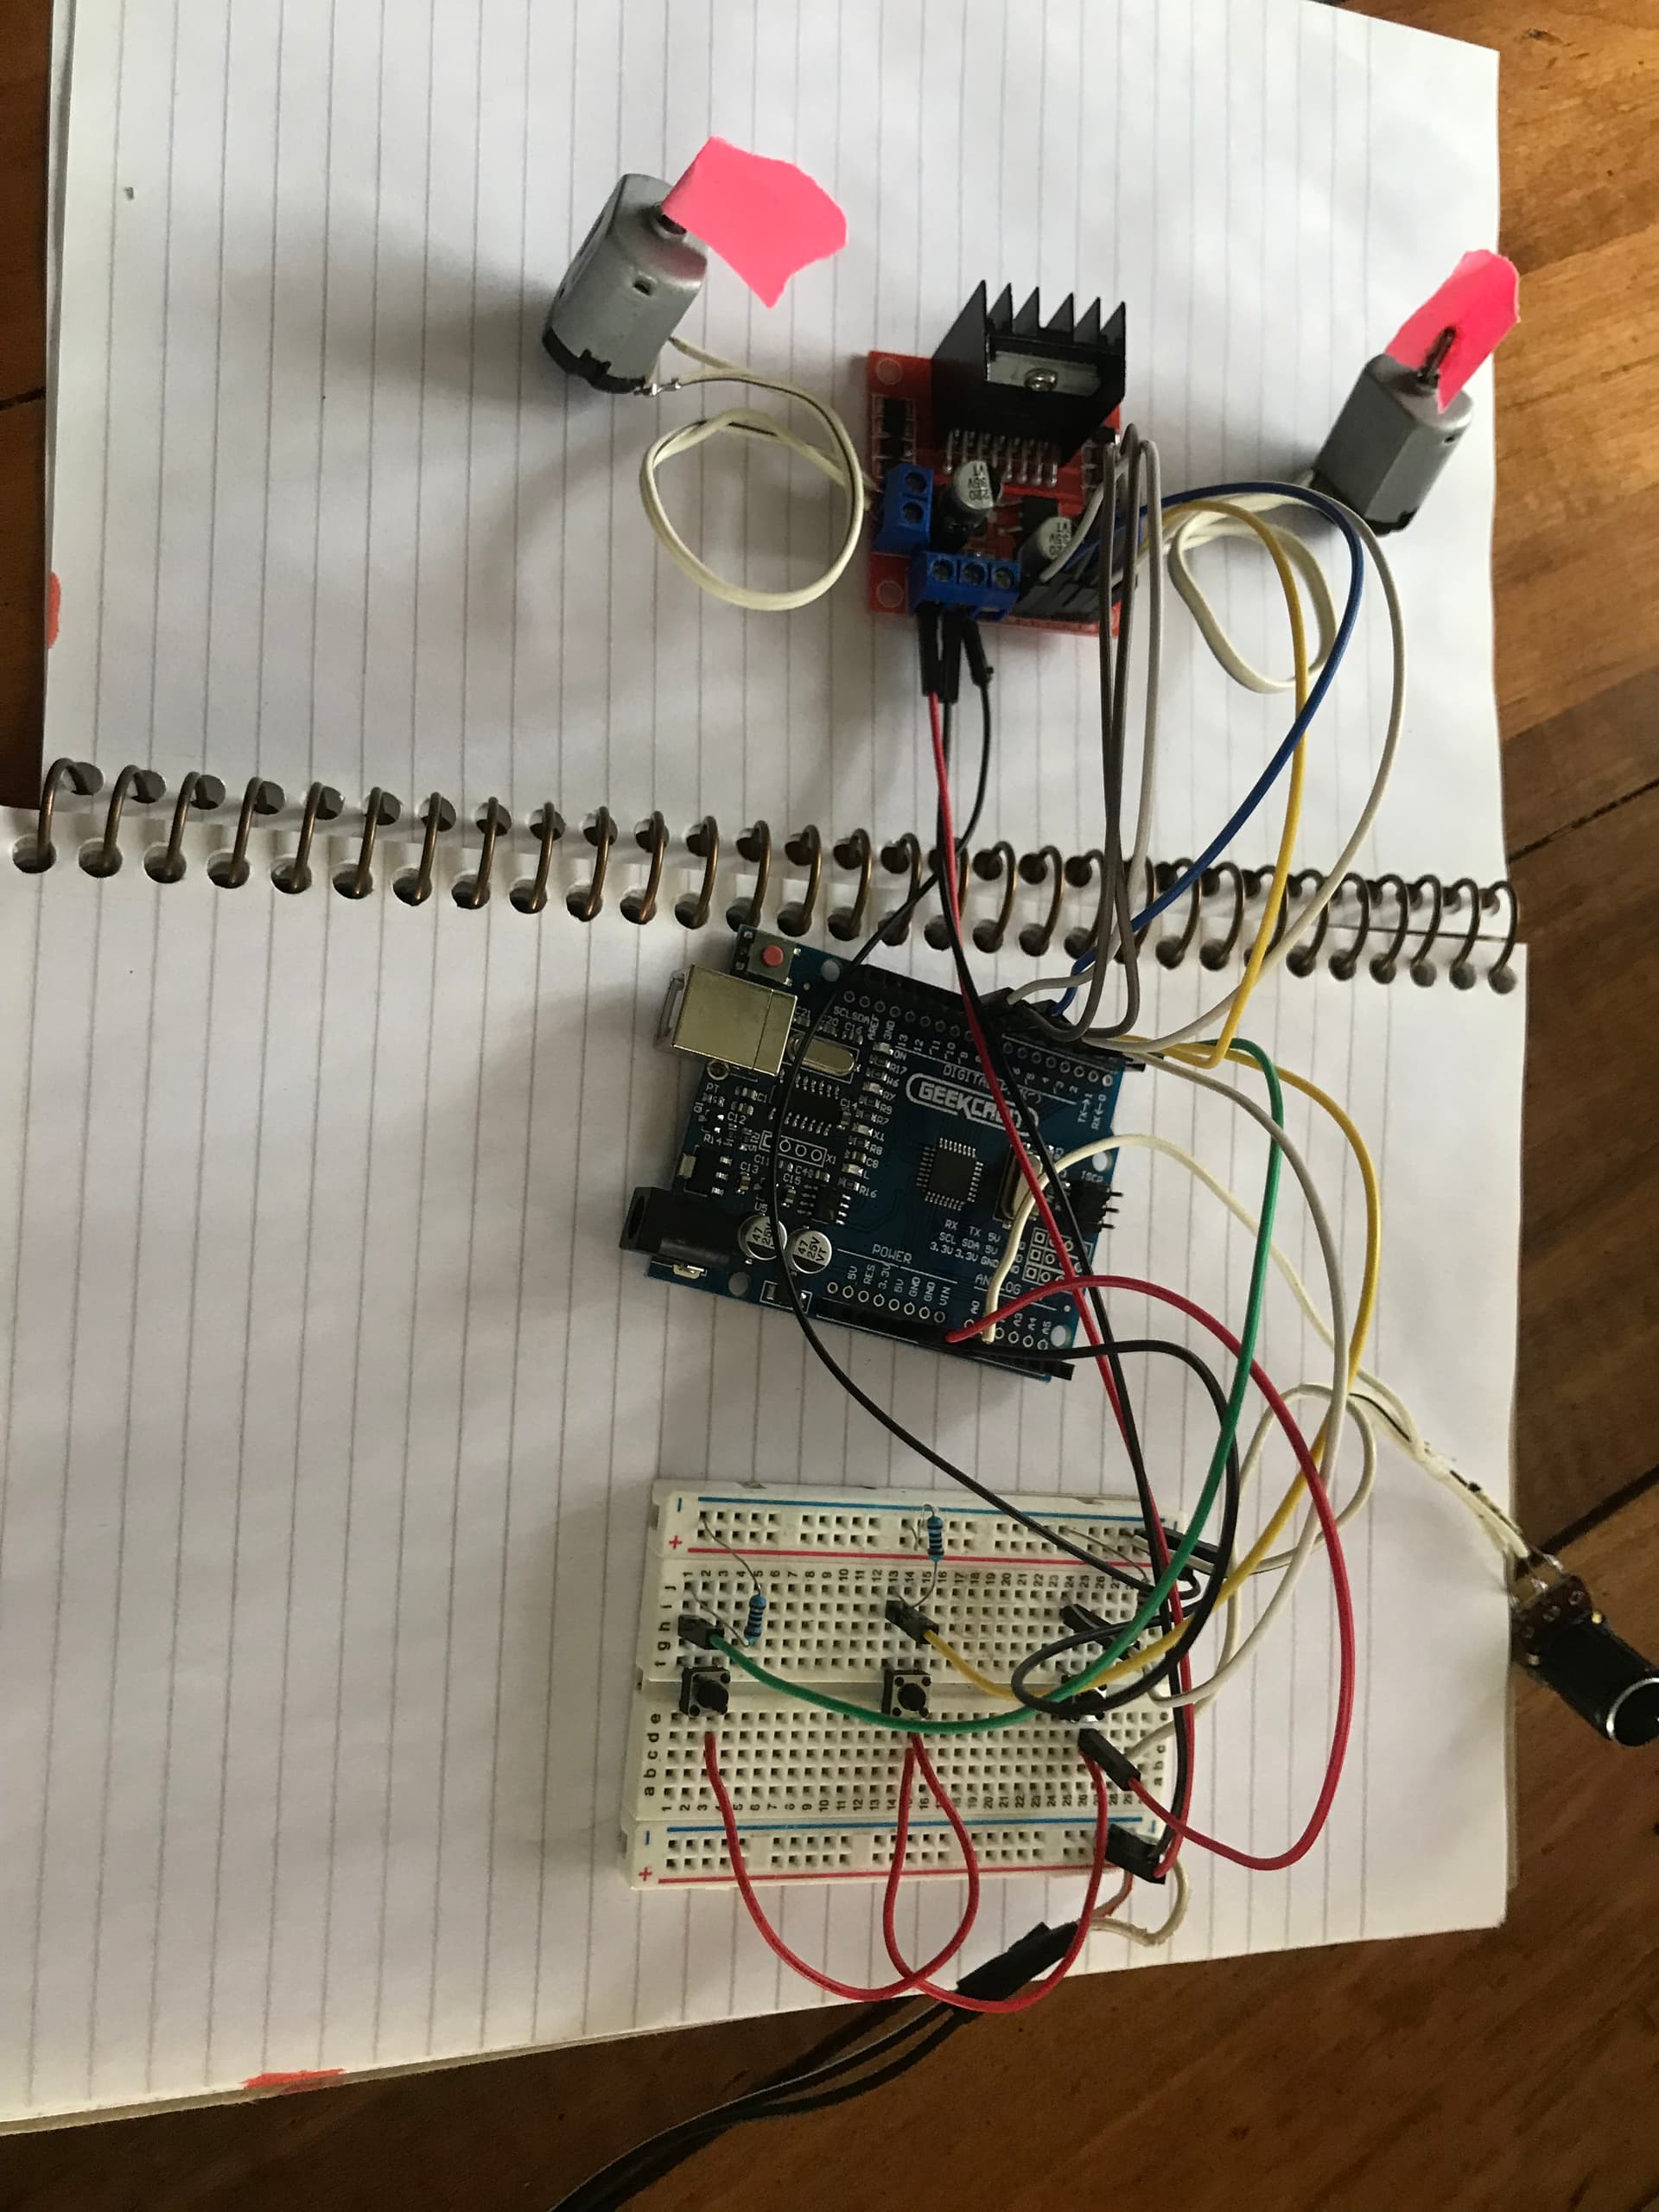
I made a PWM program with an H-Bridge and three buttons for Start, Stop and Reverse.
AND IT WORKS (pretty much)! I have
Serial.println(analogRead(A0));
Serial.println(speed1);
Serial.println(rotDirection);
When I stop, I had to set speed1 =0, because serial kept outputting the last speed1.
When the potentiometer is closed all the way and speed1=0, pushing the start button doesn’t start the motors. They are at speed1 = 0. But when I push the Start button and open the potentiometer, the motors don’t go until I push Start again with the potentiometer sending signal into A0.
Why doesn’t it go into a ready state?
Like, the motors should be engaged but motionless, so the motors start to turn when I increase A0.
When these if statements are removed and TurnMotorA is the only function running, the motors start turning as you open the pot.
And the serial output isn’t faithful in real time. Pot is fully closed, the motor isn’t running, and A0 = 290.
#include <Arduino.h>
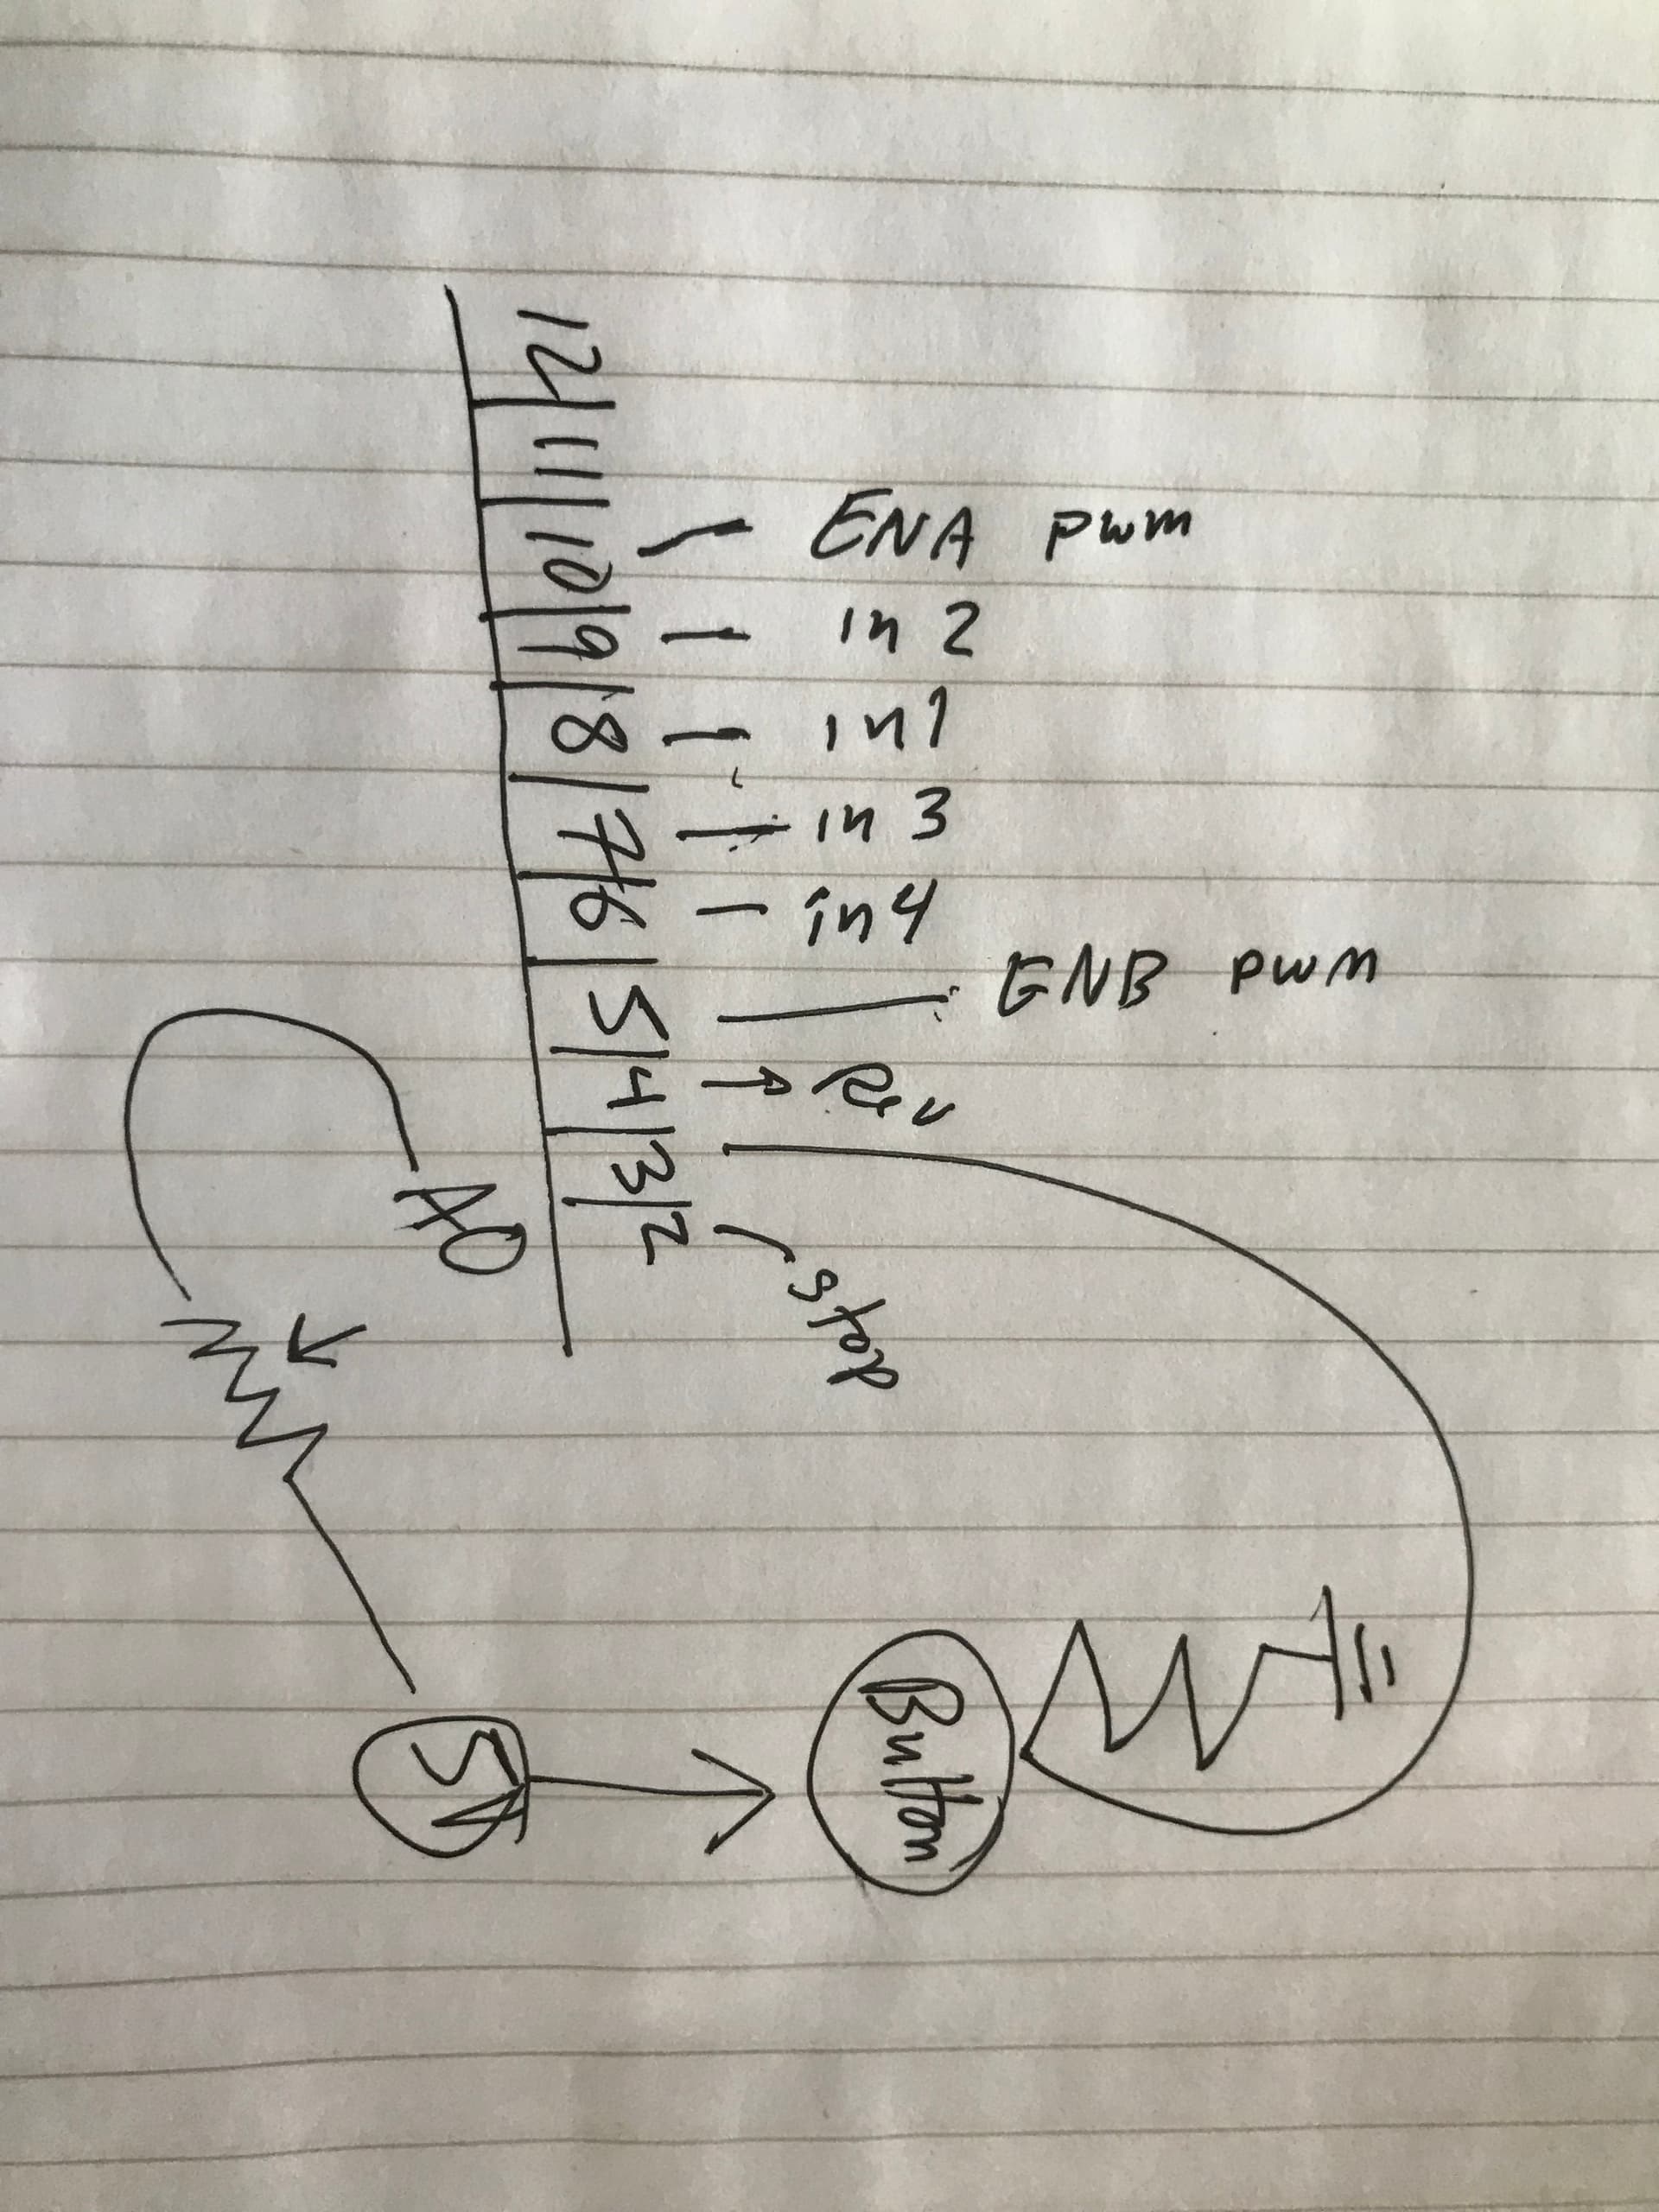
const int in1 = 8;
const int in2 = 9;
const int ConA = 10;
const int in3 = 7;
const int in4 = 6;
const int ConB = 5;
const int buttonStart = 4;
const int buttonStop = 3;
const int buttonRev = 2;
int startState = 0;
int stopState = 0;
int revState = 0;
int speed1 = 0;
int rotDirection = 0;
void setup()
{Serial.begin(9600);
pinMode(4, INPUT);
pinMode(3, INPUT);
pinMode(2, INPUT);
pinMode(5, OUTPUT);
pinMode(6, OUTPUT);
pinMode(7, OUTPUT);
pinMode(8, OUTPUT);
pinMode(9, OUTPUT);
pinMode(10, OUTPUT);
}
void TurnMotorA()
{
// We create a function which control the direction and speed
digitalWrite(in1, LOW); // Switch between this HIGH and LOW to change direction
digitalWrite(in2, HIGH);
digitalWrite(in3, LOW); // Switch between this HIGH and LOW to change direction
digitalWrite(in4, HIGH);
speed1 = analogRead(A0);
speed1 = map(speed1, 0, 1023, 0, 255);
analogWrite(ConA, speed1); // Then inject it to our motor
analogWrite(ConB, speed1); // Then inject it to our motor
rotDirection = 0;
}
void StopMotorA()
{
digitalWrite(in1, LOW); // Switch between this HIGH and LOW to change direction
digitalWrite(in2, LOW);
digitalWrite(in3, LOW); // Switch between this HIGH and LOW to change direction
digitalWrite(in4, LOW);
}
void RevMotorA()
{
// We create a function which control the direction and speed
digitalWrite(in1, HIGH); // Switch between this HIGH and LOW to change direction
digitalWrite(in2, LOW);
digitalWrite(in3, HIGH); // Switch between this HIGH and LOW to change direction
digitalWrite(in4, LOW);
speed1 = analogRead(A0);
speed1 = map(speed1, 0, 1023, 0, 255);
analogWrite(ConA, speed1); // Then inject it to our motor
analogWrite(ConB, speed1); // Then inject it to our motor
rotDirection = 1;
}
void loop()
{
Serial.println(analogRead(A0));
Serial.println(speed1);
Serial.println(rotDirection);
Serial.println();
stopState = digitalRead(buttonStop);
revState = digitalRead(buttonRev);
startState = digitalRead(buttonStart);
if (stopState == HIGH)
{
StopMotorA();
speed1 = 0;
}
if (revState == HIGH)
{
RevMotorA();
}
if (startState == HIGH)
{
TurnMotorA();
}
}