Hello, I am using PlatformIO with Arduino Framework and disco_f746ng board. My board is very similar to the origin discovery board but has additional 16MB external flash ram.
My program does not fit into the internal 1MB flash. How can I tell PlatformIO to use the external flash as well?
However, that gives you a .bin file that is too big for internal flash if it’s over 1MB. If you say you have an external flash I assume you have already a sort of bootloader that can execute the program stored in the bigger 16MByte flash though and a mechnism to burn that program into external flash.
Oh, well… that’s not so trivial. You definitely need a good understanding of the QSPI peripheral, memory maps, interrupt vector tables, linker scripts and bootloaders to get a working “execute code from QSPI” demo. You should start with resources like
Note that writing data into the QSPI connected to your STM32F7 chip cannot be done by the tools available by default in PlatformIO (aka, OpenOCD). You’ll need external flash loder programs as referenced in the above resources.
Additionally, you’ll likely need to modify the default linkerscript since that sets the base address of flash / execution at internal flash, not where your QSPI flash will be memory-mapped. You can place a modified copy the linker script in your project and refer to it via board_build.ldscript.
Long story short, from my point of view, what you need to execute the application from flash is
the ExtMem_Boot project adapted for your chip to be burned into internal flash
the linker script adapted for the QSPI flash memory address for the firmware that’s supposed to go into the QSPI (see here, here)
a way to program the resulting .bin file from the QSPI firmware build into the external flash
If the reason why your application isn’t fitting into flash is because there is large constant data (like, images etc.), it might be easier for you to just move this data into the external flash once and then load that in by the firmware that can then fit into internal flash.
Ok thank you very much for this very detailed good answer and advice. For STM32F7xx devices, is the QSPI interface always the only or typical way to connect external flash? I ask, because I am currently not sure which interface my custom disco board uses for his external flash.
Anyway, I will check the big constant data (images) thing first.
QSPI is a typical way. It all depends on the exact flash device you have, and what it supports. QSPI are usually low-cost, easy to integrate flash devices. There are of course parallel Flash devices, with tons of pins, for which the FMC (flexible memory controller) peripheral can be used for integrating.
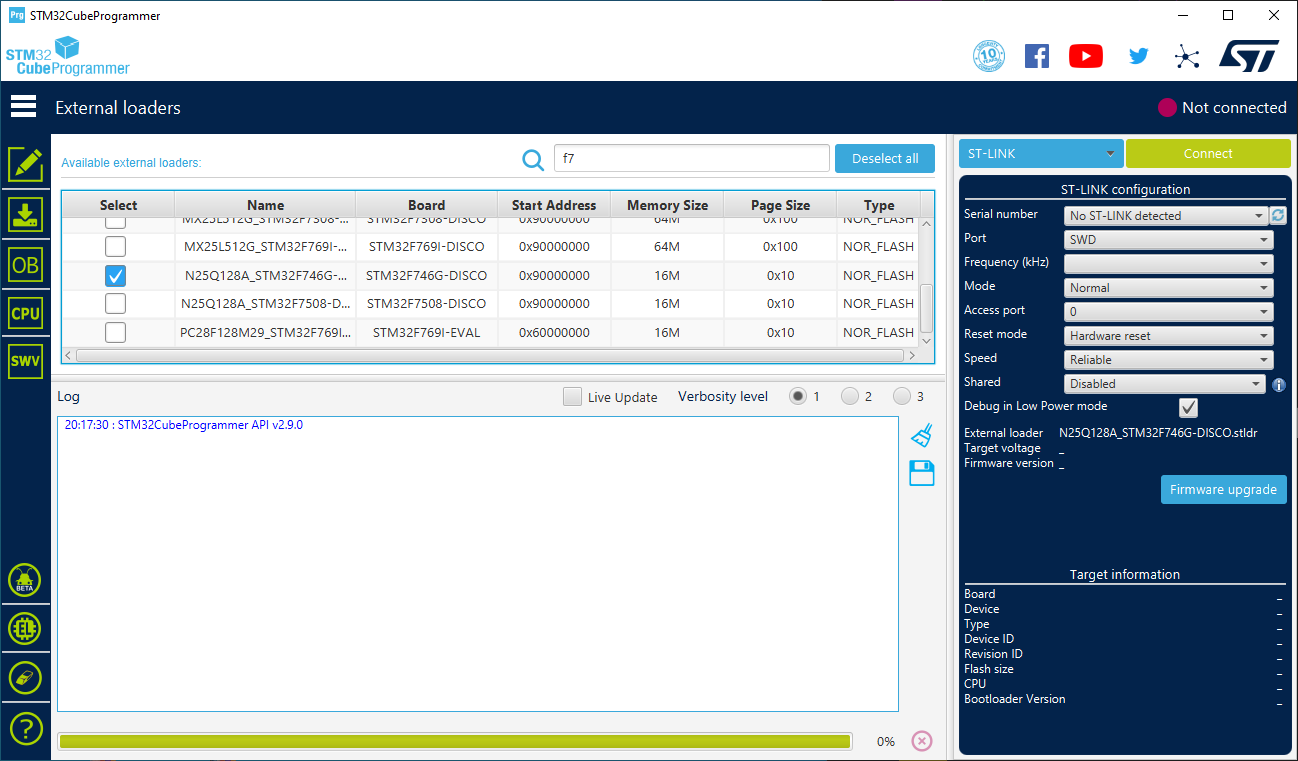
The STM32F746 Discovery board you refer to has a Micron N25Q128A Quad-SPI flash with 128MBit (=16 MByte) capacity and is logically connected to the QSPI interface of the microcontroller, as evident in the user manual chapter 4.14.
Binary image files can be written to supported flash devices and microcontrollers via the stnadard STM32CubeProgrammer tool. As you can see, it has an external loader available for the flash chip on the STM32F746G-DISCO.
In case you have designed your custom board with a different flash chip, or one that is parallel, and is not supported in the STM32CubeProgrammer, you will of course need to write your own external loader programmer. The 5-part STM32 learning series linked aboves walks one through that.
How and may I convert this C file directly into a binary file?
How do I then read these files via QSPI… that will probably not be easy either. I have to enable the QSPI hardware for sure, but how the function has to look like, which then fetches these files via QSPI correctly from the flash. This will probably be complex, unless I find somewhere already a similar example…
There’s a million ways to do that. One is to copy-paste the uint8_t data array into a C file and write a program that writes the binary content again in an image file. Using e.g. the displayed data, one can write a small utility
Please read through the examples I’ve referenced above and especially the video series. They show how to activate the QSPI peripheral and have it go into memory mapped mode. This means that if you initialize the peripheral correctly, the contents of the QSPI memory will just appear starting at a certain memory address (QSPI_BASE = 0x90000000). This means that you can just remove the data array from the C file and change
with the memory address at which the original array would appear. For example, if you burn the above shown qspi_image.bin which contains as its first element the _bg1_alpha_480x272_map into the flash, and you initialize the QSPI peripheral correctly in memorry-mapped mode, the data from the flash will just show up at 0x90000000, which is the start of the _bg1_alpha_480x272_map array. And so, data = _bg1_alpha_480x272_map, can be replaced with just .data = QSPI_BASE,. With multiple images, you then have to add an offset to it, which is the number of bytes coming before the image data you’re interested in. For example, if two images are stored in the QSPI, both 500 bytes long, then you would reference the first picture data with QSPI_BASE and the second one as QSPI_BASE + 500. This is the beauty of memory mapping – no special read functions needed, the microcontroller will internally handle reads to the special memory address by doing the QSPI read operation and returning the read data. Just as if you would read from RAM or internal flash.
Your main blocker will be writing / obtaining the correct QSPI configuration for your flash from the datasheet – if you use N25Q128A it’s directly supported through the existing driver and shown above, but even for other flash chips, as linked above but in a different branch, there are drivers stm32-external-loader/QSPI_Drivers at contrib · STMicroelectronics/stm32-external-loader · GitHub.