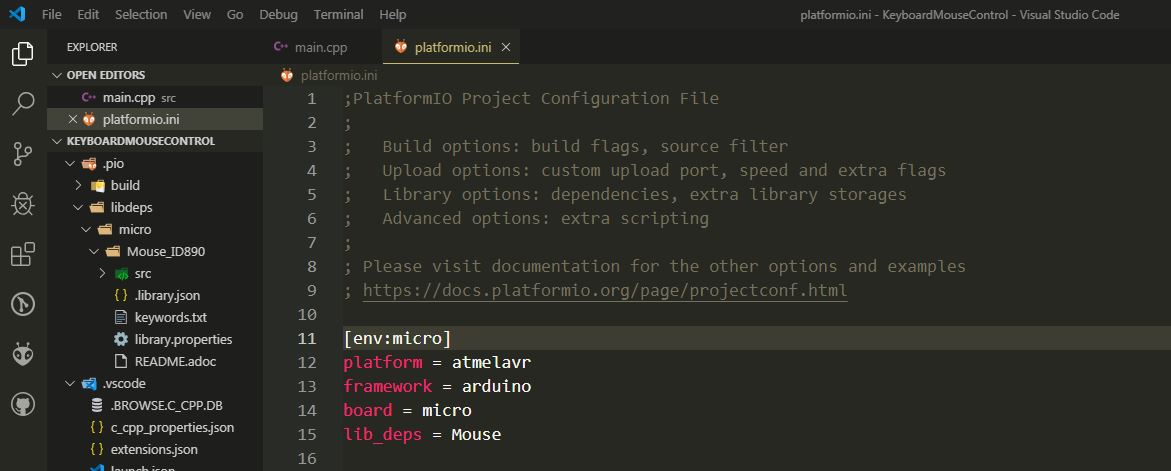
Man the configuration in platformio didn’t work:
[env:micro]
platform = atmelavr
board = micro
framework = arduino
lib_deps =
Mouse
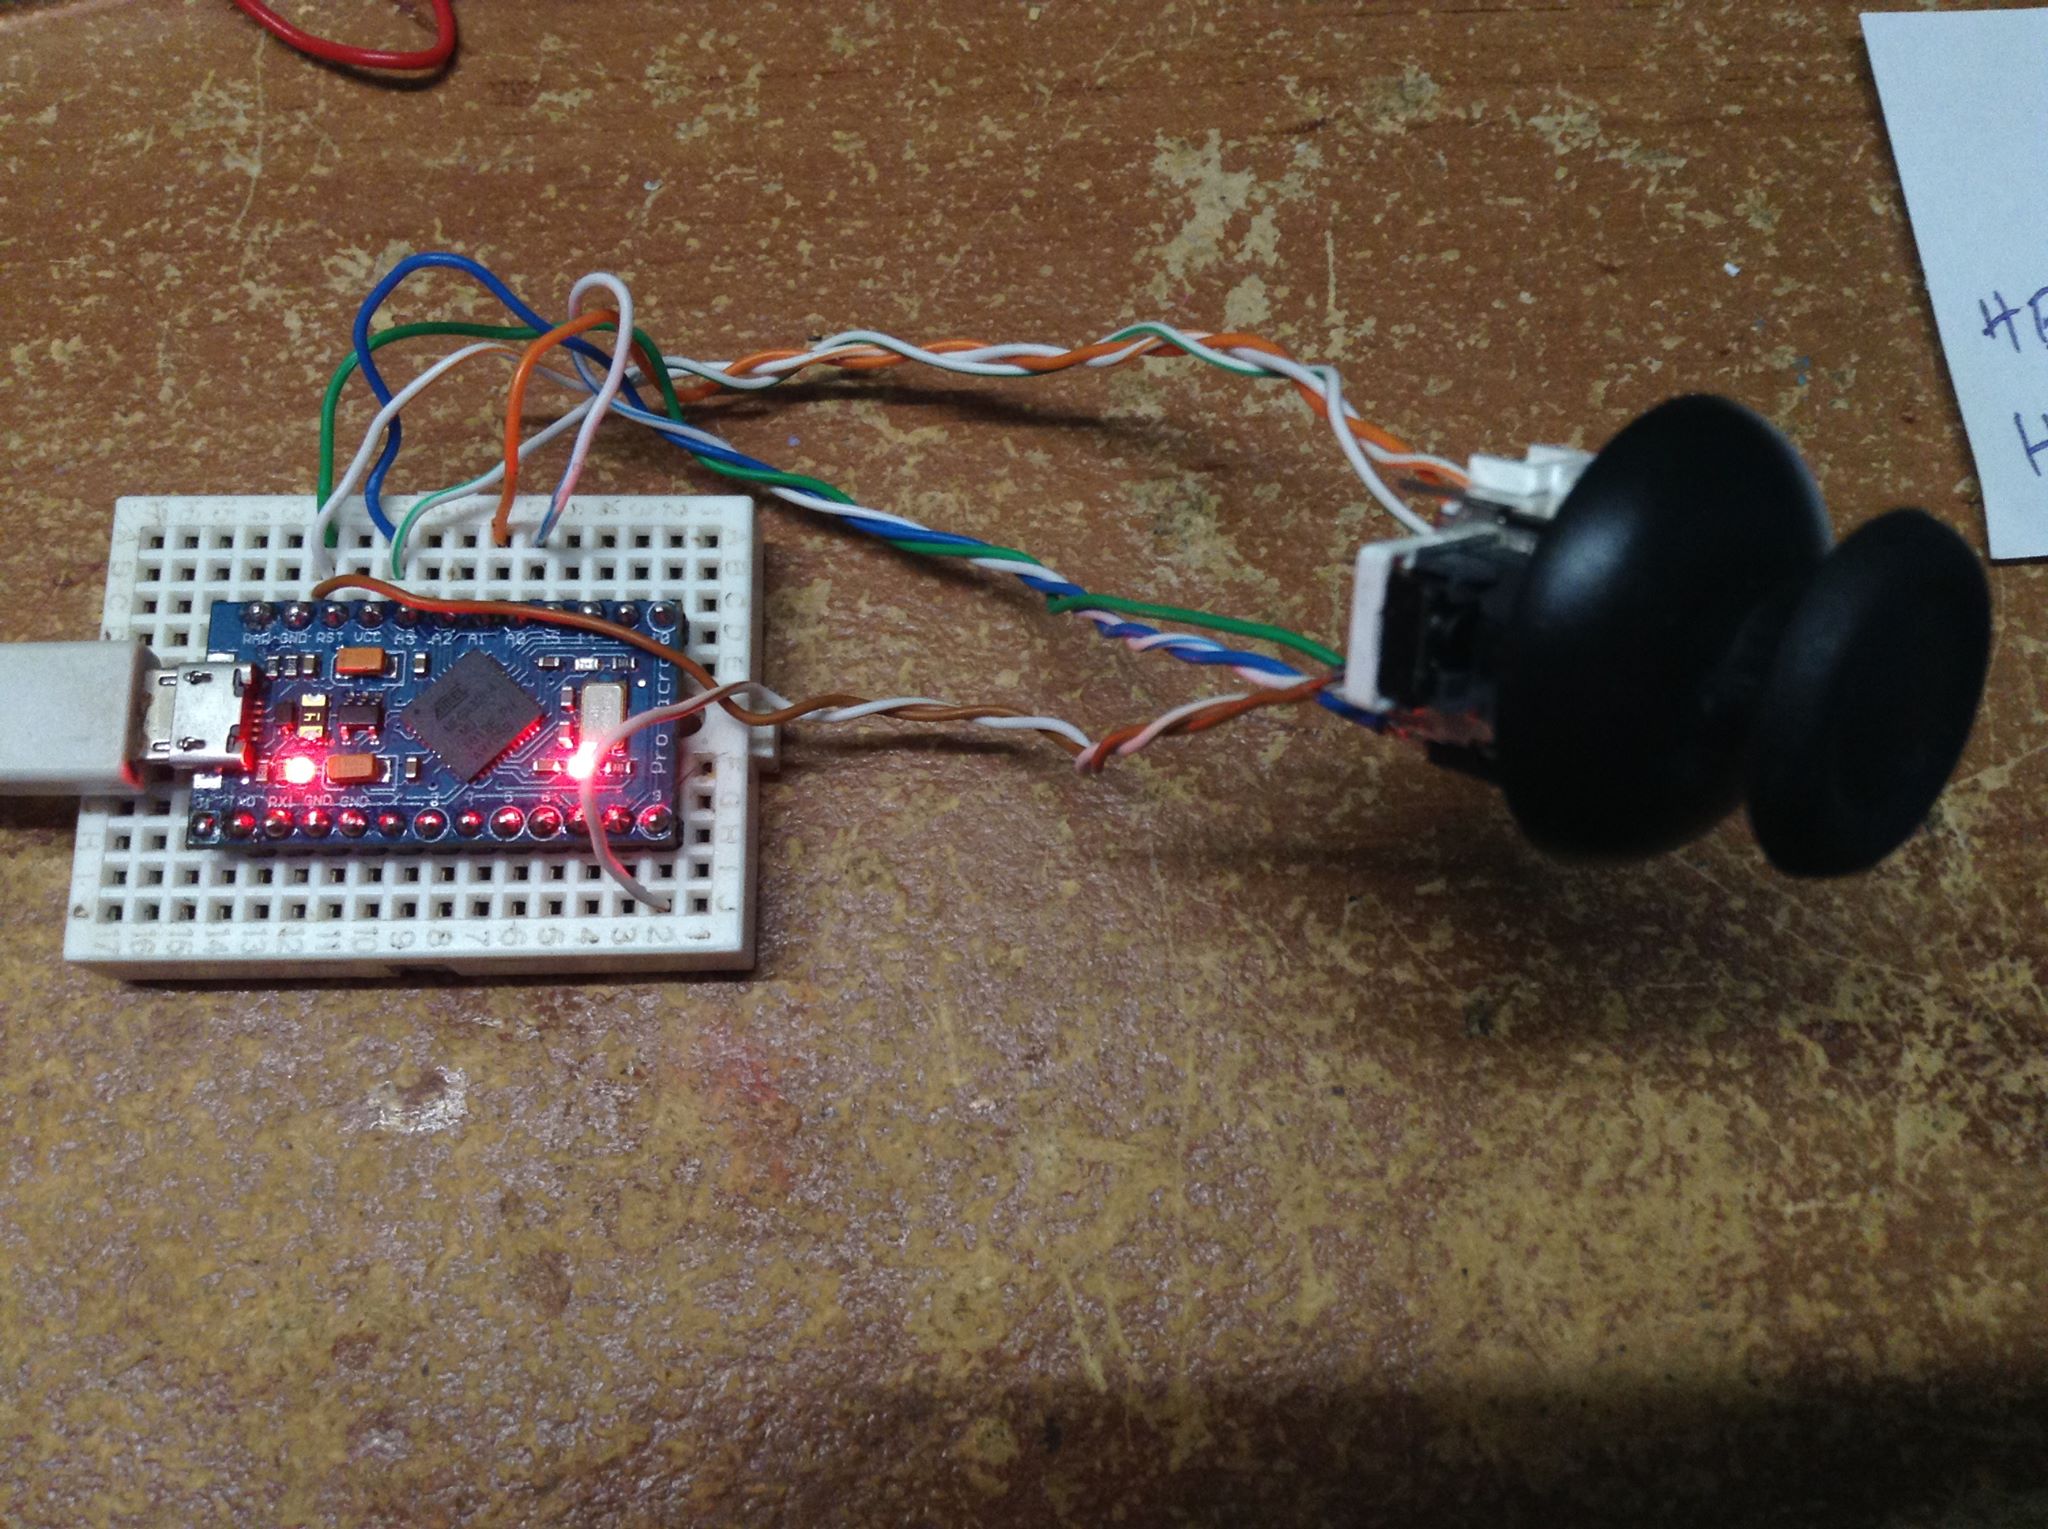
The J1 jumper makes no difference because i have always worked with it open (3.3V).
Man the configuration in platformio didn’t work:
[env:micro]
platform = atmelavr
board = micro
framework = arduino
lib_deps =
Mouse
The J1 jumper makes no difference because i have always worked with it open (3.3V).
The configuration you posted didn’t work for me:
[env:micro]
platform = atmelavr
board = micro
framework = arduino
lib_archive = no
I tested the code in Sloeber and it worked swiftly! Pratical and efficient IDE, thank you for the indication.
As for the Platformio i have not found a solution yet.
But i’m happy to have found the Sloeber, a nice plugin in a great IDE that is Eclipse.
Sorry to hear that. As I said earlier, it worked just fine with the code you provided with my board once I figured out why it wasn’t letting me upload to it without errors.
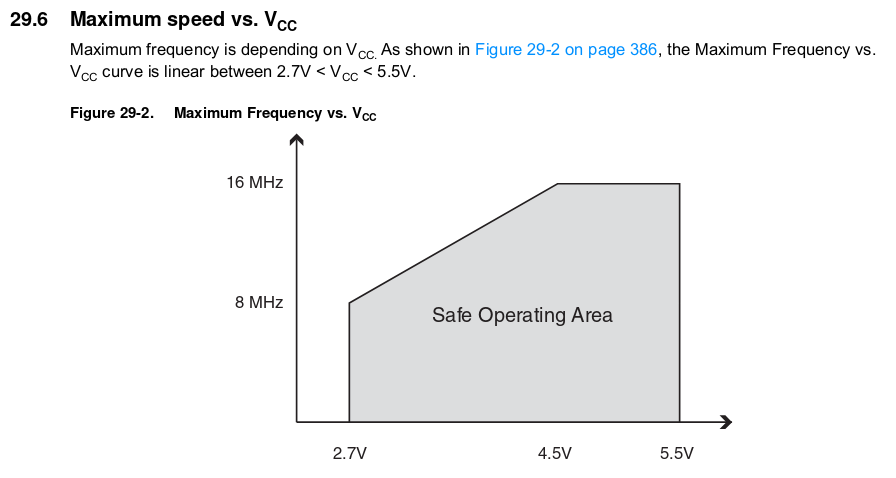
From your comments about the jumper, does that mean your Micro is a 3.3v one, rather than a 5v one (like mine is), meaning it’s running at 8Mhz, not 16Mhz? If so, this line would probably be needed in the platformio.ini (or perhaps using the sparkfun_promicro8 board setting instead?)
board_build.f_cpu = 8000000L
Regardless, good to hear you have a working environment now. 
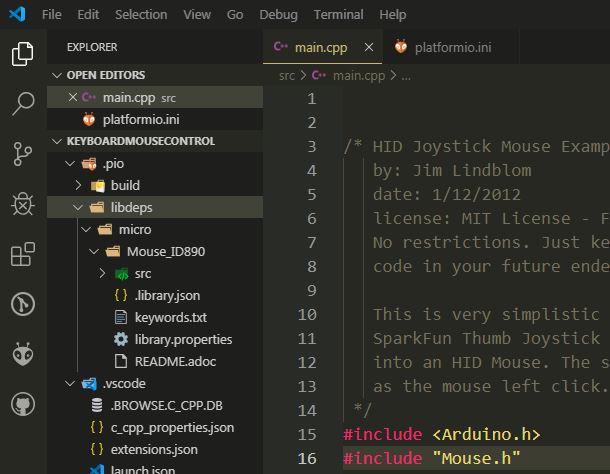
I uninstalled the Mouse.h in library manager and after i build the project, platformio automatically downloaded the library in libdeps folder.
But even so, the mouse doesn’t respond to the analog stick after i upload the code to the micro board!
Whyyyyyyyyyyyyyyyyyyyy???
Did you see my earlier reply about the clock speed, since you said you’re using a 3.3v board, not a 5v one, hence it should be running at a different clock speed than the micro (the genuine Micro never had a 3.3v version AFAIK, only the sparkfun pro micro came in both variants).
Mas i used the board_build.f_cpu = 8000000L and i almost lose my board! The Device Manager doesn’t recognize my board anymore, it only shows “Unknown Device”, i cannot upload my code, the COM Port didn’t exist! So i searched the internet for a solution and the forums only says that i need to buy a AVRISP MkII programmer to send the bootloader to the board via ICSP to make it work again!
But I found a solution myself, I reset the board and ran the upload command, and when platformio waited for the upload port I reset the board again and miraculously the upload worked!
Man, I almost got screwed over this option.
PS: In Arduino IDE and in the Sloeber IDE this project works very well!
Ok, so that sounds like the clock fuse is set for 16Mhz… are you sure it is a 3.3v Micro? You don’t need a AVRISP MkII programmer… you just need a ISP programmer, which you can use another Arduino to emulate. And once I got over the initial problems of board not wanting to upload with any IDE (PlatformIO or Arduino IDE) it worked just fine for me… so it still seems like something is different with your configuration.
Try a simple test to see if the clock speed of the CPU is the same as what the program expects… blink test with 1000ms delay… does it blink on/off with 1 second delay between state changes, or is it slower?
#include <Arduino.h>
void setup()
{
  pinMode(LED_BUILTIN, OUTPUT);
  digitalWrite(LED_BUILTIN,LOW);
  }

void loop()
{
  digitalWrite(LED_BUILTIN, !digitalRead(LED_BUILTIN));
  delay(1000);
}
Yeah, i know i can use any ICSP programmer, but i only have one for PIC microcontrolers and one TTL to USB device. Thank God i could fix without the need to buy one for Arduino boards.
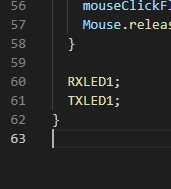
The micro does not have a built in LED, but i can control the RX and TX Leds:
#include <Arduino.h>

int RXLED = 17;  // The RX LED has a defined Arduino pin
// The TX LED was not so lucky, we'll need to use pre-defined
// macros (TXLED1, TXLED0) to control that.
// (We could use the same macros for the RX LED too -- RXLED1,
//  and RXLED0.)

void setup()
{
  pinMode(RXLED, OUTPUT);  // Set RX LED as an output
  // TX LED is set as an output behind the scenes

  //Serial.begin(9600); //This pipes to the serial monitor
  Serial1.begin(9600); //This is the UART, pipes to sensors attached to board
}

void loop()
{
  //Serial.println("Hello world");  // Print "Hello World" to the Serial Monitor
  //Serial1.println("Hello!");  // Print "Hello!" over hardware UART

  digitalWrite(RXLED, LOW);   // set the RX LED ON
  delay(10);

  digitalWrite(RXLED, HIGH);    // set the RX LED OFF
  delay(1000);
}
The RX LED blinks every exact 1 second!
My board comes with the J1 jumper opened, so the board is regulating the 5V from the USB to 3.3V? I’m thinking to short the Jumper.
That’s what I would have thought…
So, the other thing to double check as a final sanity check would be the crystal - does it have 16.000Mhz *(or similar) stamped on it?
Since you’re getting 1 sec on, 1 second off… all should be good there - that board_build.f_cpu = 8000000L is definitely not needed at all!!
And if the code is working fine with the Arduino IDE / Eclipse /w Sloeber, then it shouldn’t be the hardware at fault… but it shouldn’t hurt to change the jumper if you have a soldering iron handy… easily enough to remove the solder blob if it doesn’t give you any joy. However, I don’t think it will make matters worse, as going by this schematic, it should bypass the 3v3 regulator, and supply the ~4.7-5.0 coming from your USB directly to VCC, which means the VCC voltage will be what the ATmega32U4 actually wants.
The interesting thing is when measuring the VCC and the RAW pins they are providing 4.7V! Same on the digital ports (when they are configured as Outputs)! And the J1 is open!
The crystal on my board has 16.000 MHz stamped on it. I think the board is working with 5V/16MHz although the J1 is open, hahaha.
Raw should always be whatever comes from the USB (if powered over USB)… but yeah, Vcc being the same suggests chip is getting 5v, not 3.3v… but you can run this sketch to make sure… it’s not very accurate as the internal 1v1 bandgap value would need to be measured as IIRC it can vary 0.1v +/- from part to part … but it is plenty good enough for this job… 4.90v at the USB port is measured as 4.98v by my board.
#include <Arduino.h>

long readVcc() {
  // Read 1.1V reference against AVcc
  // set the reference to Vcc and the measurement to the internal 1.1V reference
  #if defined(__AVR_ATmega32U4__) || defined(__AVR_ATmega1280__) || defined(__AVR_ATmega2560__)
    ADMUX = _BV(REFS0) | _BV(MUX4) | _BV(MUX3) | _BV(MUX2) | _BV(MUX1);
  #elif defined (__AVR_ATtiny24__) || defined(__AVR_ATtiny44__) || defined(__AVR_ATtiny84__)
     ADMUX = _BV(MUX5) | _BV(MUX0) ;
  #else
    ADMUX = _BV(REFS0) | _BV(MUX3) | _BV(MUX2) | _BV(MUX1);
  #endif

  delay(2); // Wait for Vref to settle
  ADCSRA |= _BV(ADSC); // Start conversion
  while (bit_is_set(ADCSRA,ADSC)); // measuring

  uint8_t low  = ADCL; // must read ADCL first - it then locks ADCH
  uint8_t high = ADCH; // unlocks both

  long result = (high<<8) | low;

  result = 1125300L / result; // Calculate Vcc (in mV); 1125300 = 1.1*1023*1000
  return result; // Vcc in millivolts
}

void setup()
{
  Serial.begin(9600);
  while (!Serial){
    ;
  }
  delay(500);
  Serial.println("Ready!");
}

void loop()
{
  long vcc = readVcc();
  Serial.println("Vcc is = " + String(vcc*0.001));
  delay(1000);
}
Yeah, the RAW pin is used to power the board 5-12V or used to feed the circuit if powered through USB. I shortened the J1 and now VCC is 5.1V, now i am sure the board is 5V/16MHz. I upload the sketch for the analog stick and know what? NADA!
I am sure that the problem is something to do with platformio, the only environment this project does not work.
I run the code you send and here is the results (After shortened the J1):
--- Miniterm on COM13  9600,8,N,1 ---
--- Quit: Ctrl+C | Menu: Ctrl+T | Help: Ctrl+T followed by Ctrl+H ---
Vcc is = 5.21
Vcc is = 5.21
Vcc is = 5.19
Vcc is = 5.19
Vcc is = 5.19
Vcc is = 5.19
Vcc is = 5.19Well… drats! I can’t reproduce the issue on my side with PlatformIO using that joystick example you gave earlier, so if it is there, it’s something not right on your environment… maybe something didn’t install right.
And it sounds like you don’t need to check the USB cable (to make sure that one actually has the data connections - as some are charge only) as you wouldn’t be able to program it if that were the case… so that is the final hardware problem I can think of (other than a hub or the usb drivers making windows not want to enumerate the micro properly when in joystick mode, but then it also wouldn’t work regardless what environment you built that particular code in).
It is not a hardware problem because it works on Arduino IDE and in Sloeber IDE. I did a test in VSCode with only one extension: PlatformIO, same thing, then i tried in another computer: same thing (works on Arduino and Sloeber but not on Platformio). So the problem is really in this extension.
Ok, lets go though this again.
I pulled my thumbstick out again, and this is the current layout:
… and it’s enumerating in the Device Manager properly, and the joystick and button are moving the mouse properly.
I can compile the sparkfun example code AS IS just fine. It uploads fine. It runs fine on a Arduino Micro clone, and the 5v jumper seemed to have had some impact on my side for programming, although that could have been a red herring as I was also having issues with ModemManager on linux at the same time.
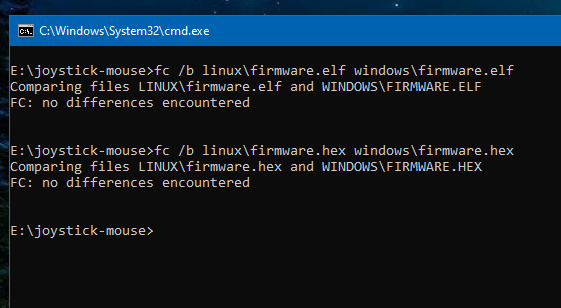
I have compiled and uploaded the code on both linux and windows, and the binary files are exactly the same (the hex file is the instruction blob actually loaded onto the processor, the ELF file contains a load of extra debugging info).
So, if I then look at the SRAM (data) and FLASH (program) usage, to glean if there is any difference between your and my compiles… I get…
You:
DATA: [= ] 8.2% (used 211 bytes from 2560 bytes)
PROGRAM: [== ] 19.9% (used 5716 bytes from 28672 bytes)
Me:
DATA:    [=         ]   8.2% (used 211 bytes from 2560 bytes)
PROGRAM: [==        ]  19.9% (used 5716 bytes from 28672 bytes)
… ok … that’s interesting… EXACTLY the same sizes… that suggests it should be working (and yes I did double and triple check that!).
So all I can suggest now is:
Either clone this repo branch, or download the zip file and try it AS IS without many any changes, no matter how trivial, without stating exactly what changes you make so it can be reproduced.
You could send me your binary, so I can compare it to mine, and see if the output is different. Or download mine and compare it on your end (e.g. fc /b file1 file 2). It’s located in .pio/build/micro folder of your project if you need to find it.
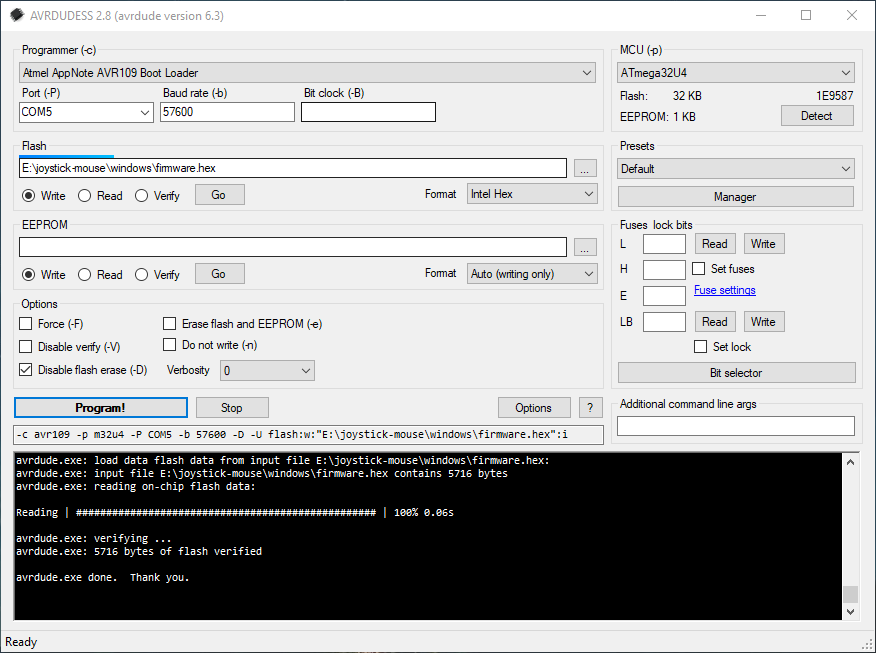
For fun, you can load the binary directly onto your micro. Using AVRDUDESS with the settings in the screenshot, you can trigger the bootloaders programming mode with the double reset to ground trick and then hitting the program button. Have a look at the output from PlatformIO to see what COM port the Micro usually claims when it’s in programming mode. For instance mine is normally COM4, and changes to COM5 when it’s in the bootloader/programming mode.
Let me know if anything jumps out, or you want me to try something different. I made sure I was running the latest release version of pio (4.0.3) using pio upgrade and that all the platform and framework files were up to date using pio update from the VScode terminal.
I see that you analog stick is different from mine, the one that i have is this (without the SJoys written):
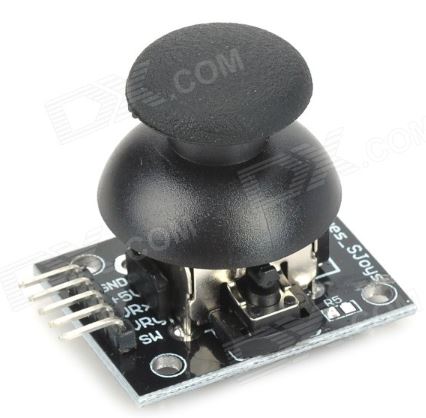
It uses only 5 connections, but i see that you used the pairs (X+/X- and Y+/Y-) in the same pin of the micro, that is what the board for the stick is doing. When i compared your HEX with mine, the terminal has said that mine HEX is larger than yours, but i uploaded you project here and it didn’t work either.
I don’t tried AVRDUDESS because i know the problem is in Platformio, as we already know that this exact code works in different IDEs for me.
Here is my project, can you test in your platformio to see if it works:
MyProject
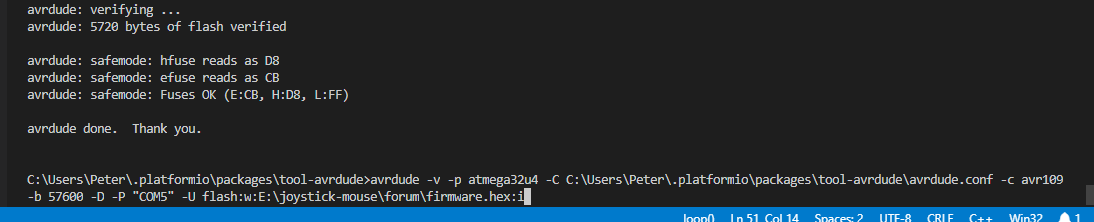
Uploading your binary resulted in no change in behaviour - the joystick/micro still worked perfectly. I verified I was actually using your code by flashing the micro with a different program, and then re-flashing it with your hex file. I ended up just using the avrdude bundled with PlatformIO as avrdudess didn’t seem to be targeting the atmege32u4 properly (first time I’ve tried using it with that mcu target).
Anyway, I then got the same ‘larger’ binary that you did …
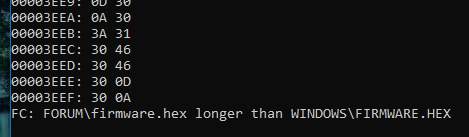
… but then saw there was two extra macros still defined at the end of your loop…
Commenting those out returned the binaries being identical.
At this point, if you do the same, and get matching binaries… I honestly can’t tell you what is going on, as if we have the exact same binaries, which work on my system, but not on yours… it would normally suggest either a hardware enumeration/compatibility issue, or a wiring issue… but you say the same code/hardware combination is working in the Arduino IDE/Eclipse… so that suggests otherwise.
What happens when you take the joystick out of the equation entirely… does ‘dumb’ mouse movement code work?
#include <Arduino.h>
#include <Mouse.h>

void setup() {
  //EDIT: Added missing (but possibly pointless)
  Mouse.begin();
}

void loop() {
  Mouse.move(0, 10, 0);
  delay(100);
}
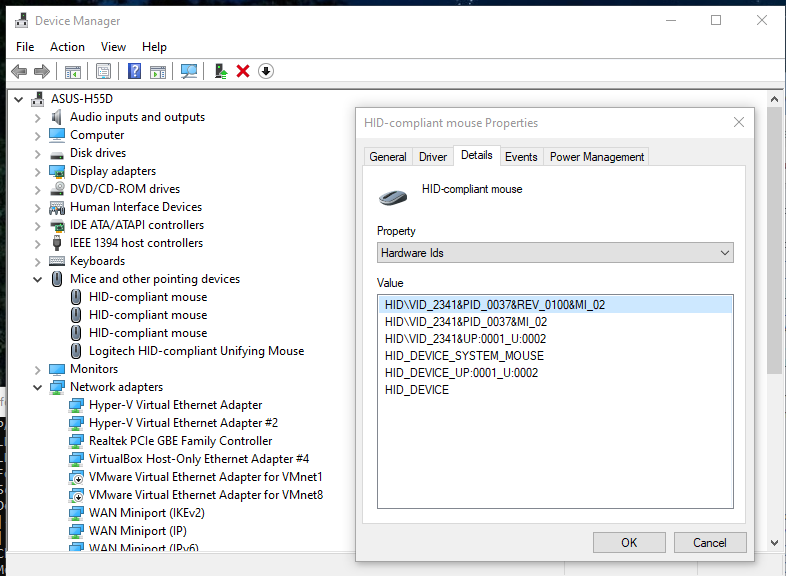
And is the usb/virtual mouse actually enumerating - i.e. can you see an entry in the Mice and other pointing devices section of the device manager that has a 2341:0037 VID:PID hardware id pair like I showed earlier?
Actually, I just realised, we’re both missing the
  // take control of the mouse:
  Mouse.begin();
… line in setup… as the Sparkfun code example is quite old, and doesn’t match the current version of the Arduino Mouse library… so that could be the culprit? On the other hand, neither Mouse.begin() nor Mouse.end() have any actual code in them, so unless their mere being called triggers something in the underlying HID library, they do absolutely nothing. :-/
Have a look at the official example here…
This line in void setup():
 // take control of the mouse:
  Mouse.begin();
Is irrelevant, otherwise it wont work in another IDEs, i tried this line and the problem persists. It is not a hardware/code problem, because the exact combination of hardware/code works in other environments. The problem is really with the platformio because the SO does NOT enumerate the hardware when i upload the code via platformio, but DOES enumerate when i upload via Arduino IDE and Sloeber IDE.
We are missing something that only the developers of this plugin knows, i already made tests in a notebook and the problem is the same as in my desktop computer.
I uploaded the code via platformio:
#include <Arduino.h>
#include <Mouse.h>

void setup() {
  //EDIT: Added missing (but possibly pointless)
  Mouse.begin();
}

void loop() {
  Mouse.move(0, 10, 0);
  delay(100);
}
And doesn’t work either, the mouse is not moving by itself because the HID-compliant mouse is not been enumerated in the Device Manager, it doesn’t appear on the list. WHYYYYYYY???
Can you double check that platformio and the platform/framework files are up to date - pio upgrade / pio update and then try again with lib_archive = no set in platformio.ini (yes, I know you tried it earlier)…
I’m asking you to try lib_archive=no again as that single option makes the resulting binary almost identical to the Arduino IDE build for this code - as opposed to basically no similarity at all.
