If you really want to, you can “trick” Clion to create a dummy target that will launch this command. To do so, you have to edit the CMakeLists.txt as below, then reload it, and a configuration will be added for your command that you can launch as a button:
Now the customisation is permanent, you will have the button with your custom command even if the project has to be reload click on the build button to the left (and not the play button) to execute the command.
No, and that could be the problem, because PIO is doing fine, but Clion is trying to compile something that he doesn’t understand.
Try to remove all the CMake Application from the list, because there are not useful for a project with PIO (except LibsUpdate of course), and keep only PIO configurations:
Be sure to remove “Z_DUMMY_TARGET” in the Executable for LibsUpdate (select nothing instead).
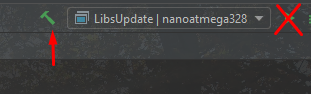
And be sure to launch the command from left button, not the right one, because Clion will try to compile something on its own if you use the right one:
That should remove the “false” compilation error from Clion
and what about if I add an environment to my platformio.ini
how can I reload all the available environements? it seems that clion is not updating the available environment.
This seems to be a current request feature for future versions of the plugin. For my part I always open a separate terminal to do a “pio device monitor”.
why they added some commands only and not all the commands that Visual Studio Code have?
The plugin is still new, there will be updates in the future, you can check the progress here.
and what about if I add an environment to my platformio.ini
how can I reload all the available environements? it seems that clion is not updating the available environment.
Right now, if you add an environment in your platformio.ini, you have to “re-init” PIO (Tools > PlatformIO > re-init), and then add the new environment in Cmake Build Execution Deployment Profiles list of Clion, exactly like this (press + button until all your new environments appear in the list).
should I manually delete the CMakeLists.txt?
Nop, PIO will edit it automatically while “re-init”.
it works ok for one environment and not for others
If you want to do this, you have to add a different build flag for each of your environment in your platformio.ini, like this : build_flags = -D TARGET_MYENV_ONE
And then, after re-init PIO, and adding your different environments in Clion as say above (if not already), Clion will recognize the environment you have selected (in the list next to build button), and update code features accordingly, so it will understand when you write #ifdef TARGET_MYENV_ONE or #ifdef TARGET_MYENV_TWO
but the code is not “highlited” correclty.
If you see in my screenshot the “glowwormluciferinlight” env is selected, but in the code, the TARGET_GLOWWORMLUCIFERIN is highlited, I expect to see the TARGET_GLOWWORMLUCIFERINLIGHT highlited instead.
Okay, this is a weird issue, either from PIO or Clion.
To resolve it in your case:
open your platformio.ini
rename your first environment from “glowwormluciferin” to “glowwormluciferinfull”
re-init PIO
update cmake profile list (remove the old one, add new one)
And now code insight is working correctly, don’t ask me why
I would suggest this is an issue from Clion, because the “CMakeListsPrivate.txt” generate by PIO seems fine. Maybe environment names are too long ? maybe Clion is using a “match case” or something and triggered on the two environment at the same time when updating code insight because the names of your environments are slightly the same ? Or maybe we both have outdated Clion IDE ?
UPDATE: how to reproduce the issue:
set your first env name (lets say “abc”), and set your second env name.
If the second env name contain anywhere in it the first env name (lets say “averabcty”), then Clion code insight will be buggy. To resolve this, check that all your environment names doesn’t contain another environment name in it.
In your case, if you rename your first env name “glowwormluciferin” to “glowwormluciferinfull”, then code insight will work
I also suggest updating the official documentation of the plugin and the getting started guide because it was hours for me to find out why is displayed everything in red in my code