Just to give you a quick overview of how you can work with PIO remote, this is what I just did.
Using a Raspberry PI (the remote agent) that had a Wemos D1 Mini plugged into it, I ran up PIO Remote via the platformio remote agent start command. There was some updating involved, and I actually had to run the command twice, as the first time did all the updates and seemingly failed, but worked perfectly the second time I ran it.
Now, on my desktop (the host), I ran up VSCode + PlatformIO, and created a new project, selecting Wemos D1 Mini as my target board. I then mocked up a simple blink sketch. Next, I clicked ‘Remote Devices’ to find out what port to use to upload to the Wemos D1 Mini. In this instance, it’s /dev/ttyUSB0, since ttyAMA0 is the native serial port on the rPi.

Next, added that to the platformio.ini, and also set the upload speed, as it defaults to 115200.
[env:d1_mini]
platform = espressif8266
board = d1_mini
framework = arduino
upload_port = /dev/ttyUSB0
upload_speed = 460800
I then pressed ‘Remote Upload’, and my desktop compiled the program, and then sent the file to the raspberry pi. Since it was the first time I’d used an esp8266 device, the raspberry pi also had to configure itself up to support the esp8266 platform, but that just added a little time to that first upload. I then got the results of the upload, as if the device had been connected locally.
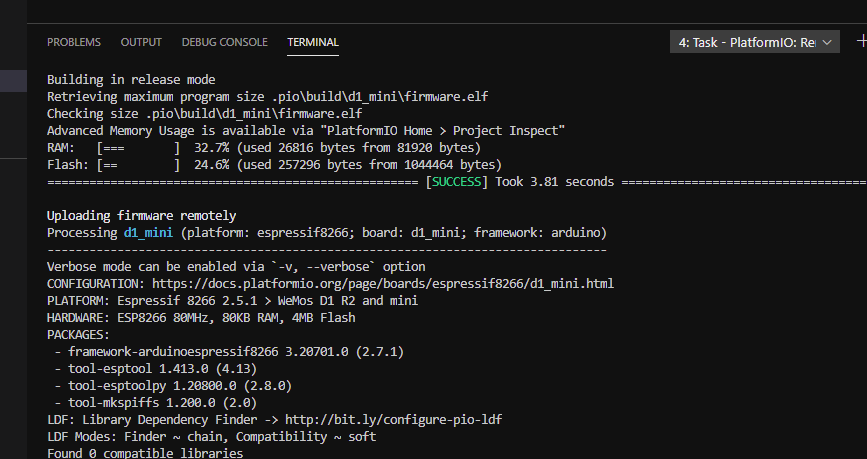
And the target ESP8266 was now happily running the blink sketch. Now, if you have confidence in ArduinoOTA uploads, you can even do OTA updates, where instead of the serial port, instead you put the IP address or hostname that the raspberry pi would use the access the ESP8266. i.e. if I wanted to use PIO remote to OTA update a device called ntpClock.local and I was away from home, it would be as simple as entering upload_port = ntpClock.local and pressing the Remote Upload button… no need to set static IPs, etc. All that is needed is a device that can see the ntpClock.local to be online and running PIO Remote.
Authentication is done via your PIO account login. There is no need to ‘add’ devices on the remote end - if they are USB based, you just plug them in. If they are network based, you just ensure they are accessible to the remote agent. AFAIK, PIO can only update 1 device at a time. But you can have several environments configured in your platformio.ini, once for each board, and I suspect when you press the 'remote upload` button that it will process all the environments at once, unless you specifically target one particular environment. So that should let you update them effectively all at once, although in the background it would really be one at a time, in turn.
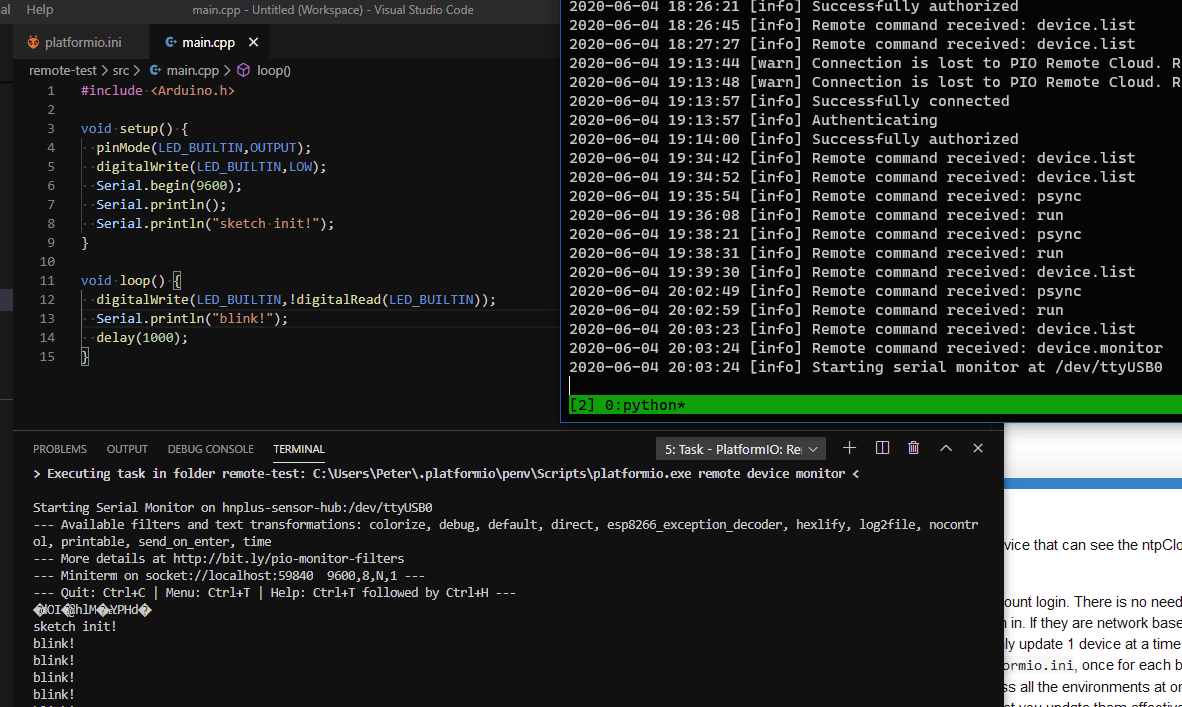
For the remote serial monitor, again, it’s just a matter of hittinng ‘remote monitor’ (here you can see the code, remote serial at the bottom, and the log of the remote agent I have running on the raspberry pi):
I hope that answers some of your questions, and isn’t just confusing you with information overload! ![]()