How to get started with platformio remote upload?

Hello

VS Code Version: 1.45.1 (system setup)
PlatformIO version: 4.3.4
Python version: 3.8.3
OS: Windows 10 pro x64 10.0.18363

I have many problems follow the documentation about platformio remote, seem like it jump many steps or is only for advance users. I don’t know if my level of English is not enought for understand, but is very dificult for me.

  1. The installation proccess is not clear, when I tried run Remote, showed me an error, that I don’t have python 3.5 intalled and I need to unistall Plaformio Core and reinstal, but I have the lastest version of both. Them, the command python get-platformio.py gave me an error, I deleted penv folder but nothing change, the error continued, I don’t know what exactly I did for resolved, but I get a new warning:
    Obsolete PIO Core v4.3.4 is used (previous was 4.3.5a1) Please remove multiple PIO Cores from a system: https://docs.platformio.org/page/faq.html#multiple-pio-cores-in-a-system
    when I tried uninstall, only show one version installed.

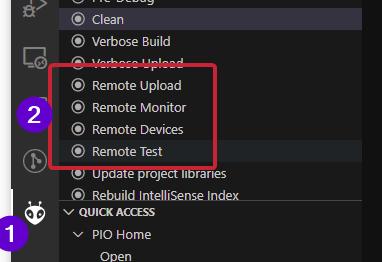
  2. How I can add new device to the list? pio remote agent start only add the computer that I use, but I want to add my ESP8266

  3. Do I need to use a static IP? I already used OTA for other proyect, but only in a local network, PIO Remote can upload outside of local, but I don’t even know the configuration for .ini file for this.

  4. What is the code for ESP8266? I mean, if I need a library, an authentication process or connect to a specific server. Is only avalible for some devices?

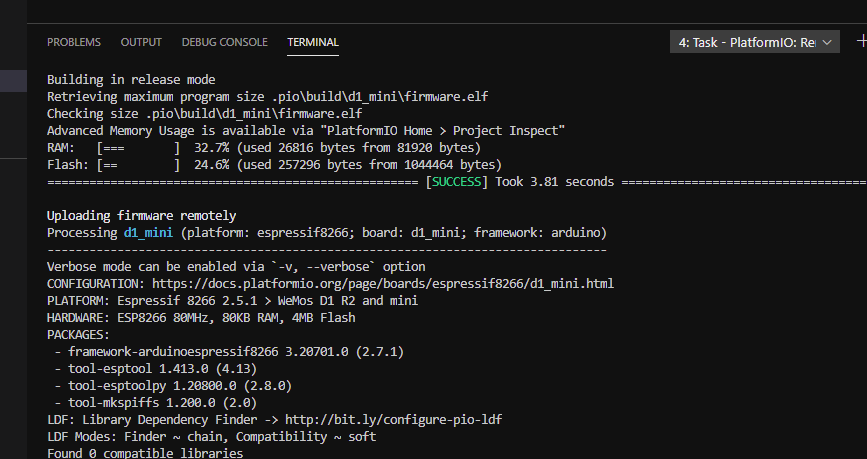
  5. How I can Upload to a device?

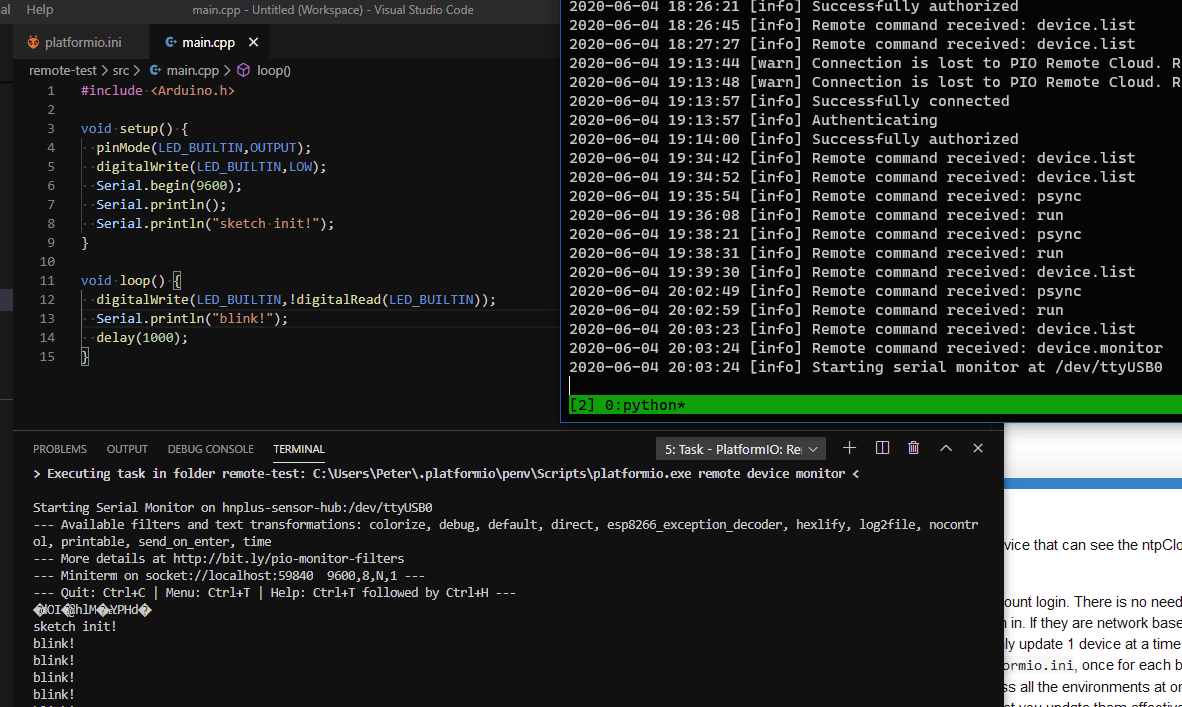
  6. How I can use remote serial monitor?

I’m doing a IoT proyect, and I want to know how to update devices remotely. If I have 10 devices, updete one by one, desconnecting or moving it can be a true pain. But, PIO remote can update 10 devices simultaneously or I need to do one by one?

If you have two devices… lets say one is a raspberry pi, to which your ESP8266 is plugged, and the other is your desktop computer.

When you run platformio remote agent start on the raspberry pi, assuming you’ve entered your login credentials, that’s all you should have to do that end.

Now, when you go to your desktop computer, what does platformio remote device list (or the GUI option if you’re using VSCode - see below) get you? Does it list the ESP8266/serial device on the remote machine?

Now, what development environment / IDE are you using on your ‘desktop’ computer? VSCode? Something else? Or are you using the command line? If you’re using VSCode, and have the PlatformIO extension installed, you can use the ‘Remote’ options as well.

image

Just to give you a quick overview of how you can work with PIO remote, this is what I just did.

Using a Raspberry PI (the remote agent) that had a Wemos D1 Mini plugged into it, I ran up PIO Remote via the platformio remote agent start command. There was some updating involved, and I actually had to run the command twice, as the first time did all the updates and seemingly failed, but worked perfectly the second time I ran it.

Now, on my desktop (the host), I ran up VSCode + PlatformIO, and created a new project, selecting Wemos D1 Mini as my target board. I then mocked up a simple blink sketch. Next, I clicked ‘Remote Devices’ to find out what port to use to upload to the Wemos D1 Mini. In this instance, it’s /dev/ttyUSB0, since ttyAMA0 is the native serial port on the rPi.

Next, added that to the platformio.ini, and also set the upload speed, as it defaults to 115200.

[env:d1_mini]
platform = espressif8266
board = d1_mini
framework = arduino
upload_port = /dev/ttyUSB0
upload_speed = 460800

I then pressed ‘Remote Upload’, and my desktop compiled the program, and then sent the file to the raspberry pi. Since it was the first time I’d used an esp8266 device, the raspberry pi also had to configure itself up to support the esp8266 platform, but that just added a little time to that first upload. I then got the results of the upload, as if the device had been connected locally.

And the target ESP8266 was now happily running the blink sketch. Now, if you have confidence in ArduinoOTA uploads, you can even do OTA updates, where instead of the serial port, instead you put the IP address or hostname that the raspberry pi would use the access the ESP8266. i.e. if I wanted to use PIO remote to OTA update a device called ntpClock.local and I was away from home, it would be as simple as entering upload_port = ntpClock.local and pressing the Remote Upload button… no need to set static IPs, etc. All that is needed is a device that can see the ntpClock.local to be online and running PIO Remote.

Authentication is done via your PIO account login. There is no need to ‘add’ devices on the remote end - if they are USB based, you just plug them in. If they are network based, you just ensure they are accessible to the remote agent. AFAIK, PIO can only update 1 device at a time. But you can have several environments configured in your platformio.ini, once for each board, and I suspect when you press the 'remote upload` button that it will process all the environments at once, unless you specifically target one particular environment. So that should let you update them effectively all at once, although in the background it would really be one at a time, in turn.

For the remote serial monitor, again, it’s just a matter of hittinng ‘remote monitor’ (here you can see the code, remote serial at the bottom, and the log of the remote agent I have running on the raspberry pi):

I hope that answers some of your questions, and isn’t just confusing you with information overload! :slight_smile:

Thanks for your reply, now I understand…
I need another PC for upload, I thought it was upload directly to de device.
That’s mean for the “remote monitor” needs the device is connected via USB in the other PC.
Basically, is just execute commands in another PC.

For the OTA updates, I think this method it will work if only there are a few devices, but for example 100 or 1000 devices, it can be inefficient. HttpUpdate it could work better in this scenario (I want to know if I can update via Git repo, I can’t find any information about this, micropython can, but I don’t know arduino).

Thanks, you help me a lot…

1 Like

Spot on.

I can’t put my finger on it right now, but Ivan did have an OTA example that used bintray to host the binaries, which would work with HttpUpdate, etc. There are other solutions I’ve seen, which use github releases, or other methods of doing ‘auto-updates’.

If I can find that link, I’ll add it here

Hm… it was for the ESP32, but can still probably be adapted for the ESP8266.
https://docs.platformio.org/en/latest/platforms/espressif32.html?highlight=bintray#using-jfrog-bintray-free-and-secure-cloud-solution