Arduino UNO as ISP error on com port

I am new to PlatformIO.

I manage to installed platformio ide on vscode. I try upload a blink sketch with using Arduino UNO as ISP for ATTiny45. My hardware is UNO with ATTiny45 programming shield sitting on top of UNO.

The error i face as below. I had tried a many hours changing the platformio.ini file, the upload_port i had tried are COM3, COM[13], COM4 are all not working. My Arduino IDE COM Port is COM3.

I also try using new project with Arduino Mega Board 2560. It was able to successfully upload a blink sketch, the automatic detection of com port is COM4. Then I revert back to Arduino UNO with ATTiny shield, COM4 is not working as well. The error is below.

I need help. Plz.

Greetings!

Shut down VSCode and open up the Arduino IDE with your Arduino as ISP attached in the usual manner.

Go to Tools->Port and make sure that you have the correct port. Try to upload a sketch. If it works, we have the correct port. Close the IDE.

Open VSCode again, and open your project folder, then open platformio.ini - is the correct port found in upload_port? If not, fix it.

Now, you can only upload using a bootloader. In the Arduino IDE, to upload with a programmer, like a USBtiny, or Arduino as ISP, you have to hold SHIFT when you click the upload button. That uses the programmer, not the bootloader.

In VSCode, click the “alien face” icon on the left toolbar. That opens a list of tasks that you can do. Look in the list for “Upload Using Programmer” (probably not the option “Upload using programmer and set fuses”, so be careful!

That should then use your Arduino to program the ATtiny45.

HTH

Cheers,
Norm.

Thank Norm for your help. I have done all these prior to writing for help. So far, still cannot work. It is the same. I try using Arduino Mega board, can load successfully. That means the environment setup is okay. Only Arduino as ISP setting is not right, does not detect the port. I tried without port also not working.

Maybe I have to try using USBasp or others.

Hmm, interesting.

I havebsome ATtiny85 microcontrollers somewhere. If I get any “playtime” later, I’ll see if I can replicate the problem, and maybe even fix it.

Cheers,
Norm.

EDITED: Minor corrections after a retest.

Ok, here’s what I did.

I uploaded ArduinoISP to my Arduino Uno, having first set the define #USE_OLD_STYLE_WIRING so that I got:

  • Pin 10 = RESET.
  • Pin 11 = MOSI.
  • Pin 12 = MISO.
  • Pin 13 = SCK.

There are some comments in the code that it uses the 6 pin ISCP header and this doesn’t work with the normal pins. I’m used to those pins, so that’s what I’m using. (I retested this, it still refuses to work when connections are to the 6 pin header. I have to use the Arduino pins above to get anything working.)

Interestingly, it no longer works on my Duemilanove, only on my Uno. Hmmm

I used a brand new ATtiny85, so it’s fused at 1 MHz internal.

In the Arduino IDE, I opened the Blink example, and changed the LED_BUILTIN to 0.

I then selected the ATtiny85, clock speed 1 MHz Internal, port /dev/ttyUSB0. And tested an upload. That worked fine. With the LED on PB0 aka Pin 5, I got a 1 second blink.

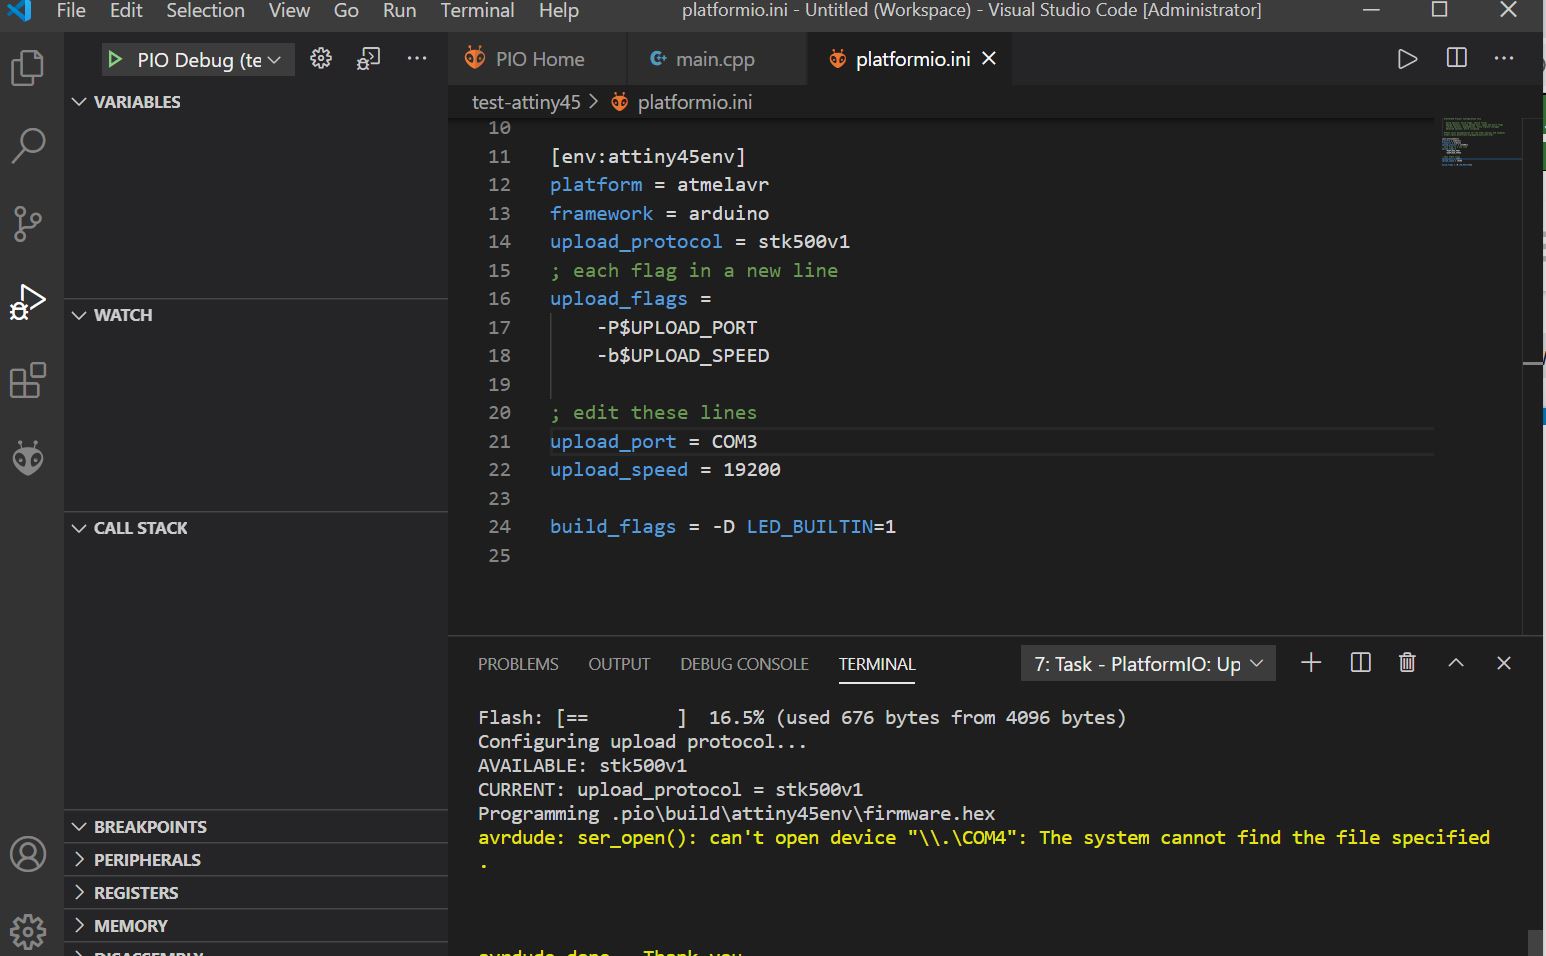
Over to PlatformIO. I created a new project with board = attiny85. This is my platformio.ini file:

[env:attiny85]
platform = atmelavr
board = attiny85
framework = arduino
upload_protocol = stk500v1
upload_flags =
    -P$UPLOAD_PORT
    -b$UPLOAD_SPEED
upload_port = /dev/ttyUSB0
upload_speed = 19200

I didn’t have to define LED_BUILTIN as when I did so, like your example above, I got an error about a redefinition when I compiled it.

This is my code. I changed it to make sure that I did actually do the upload via the Uno. This is now different from the standard blink sketch. I did a quick search and replace - to swap LED_BUILTIN for just 0.

/* ATtiny85 Blink.
 *
 * Pin 4 = GND
 * Pin 5 = resistor and then LED +ve, LED -ve to GND.
 * Pin 8 = VCC
 *       __ __
 *      o  U  o VCC
 *      o     o
 *      o     o
 * GND  o_____o--> R1 -> LED1+ve. LED1-ve -> GND.
 *
 * Testing the use of Arduino Uno as ISP from PlatformIO.
 *
 * Norman Dunbar
 * 6th September 2020.
 */

#include "Arduino.h"

void setup() {
  pinMode(0, OUTPUT);
}

void loop() {
  for (byte x = 0; x < 4; x++) {
    digitalWrite(0, HIGH);
    delay(150);
    digitalWrite(0, LOW);
    delay(150);
  }
  delay(1000);
}

As I have the command line tools built in, I did a quick test compile and upload:

pio run
...
pio run --target program
...

The first compile downloaded some stuff (technical term!) for the attiny85:

Tool Manager: Installing framework-arduino-avr-attiny @ ~1.3.2
Tool Manager: framework-arduino-avr-attiny @ 1.3.2 has been installed!

The compile and program worked and the LED is now blinking again. Mind you, it’s blinking very slowly as it appears that the ATtiny85 “board” for PlatformIO is an 8 MHz clock, not 1 MHz as per the factory settings. Never mind, it programmed via the Uno.

Into VSCodium now.

After File->Open Folder, I clicked the build icon on the bottom status/toolbar. The build worked.

I then, accidentally, clicked upload (silly me!) and funnily enough, the ATtiny85 was programmed. Umm - that’s never happened before, I’ve always had to “program” as opposed to “upload” - so we learn something new here! I suspect that PlatformIO “knows” that an ATtiny85 cannot have a bootloader?

Just to be certain, I divided all the delay() periods by 8 in the code above, and recompiled and uploaded it. Everything is running fine again.

So, my apologies for misleading you, you don’t have to find and execute the “upload using programmer” task for an ATtiny85 (or 45) as PlatformIO seems to be aware and the normal upload task/shortcut/icon will do the necessary!

It’s all working here. Here’s what I would check on your setup:

  • In the code for ArduinoISP, make sure you have the #define USE_OLD_STYLE_WIRING - if your shield uses those pins as opposed to the 6 pin ICSP header. The code defaults to using the header, not pins D10-D13.

  • You might need a capacitor, can’t remember the size, on the Uno between RST and GND. The shield probably has this built in? I didn’t need it with my setup of an UNO and a “bunch of wires”.

  • Does the Attiny program properly with the Arduino IDE? Select “Arduino as ISP” as the programmer, not STK500 etc. And definitely not “ArduinoISP” - just to confuse matters.

  • Are you fused for 8MHz? This page, LEAP#275, has details of how to check and how to reset. The ATtiny85 stuff I was looking at in PlatformIO runs at 8MHz. Mine was at 1MHz, but worked slowly. Perhaps you are runing 16MHz and it’s not liking it? You can pio run --target fuses from the command line, probably the VSCode as well - I didn’t look - but you need to set the fuses in the platformio.ini file.

Good luck.

Cheers,
Norm.

I suspect it’s more the upload_protocol = stk500v1 - meaning it will want to program - rather than talk via the bootloader. I reserve the right to be talking complete nonsense though. :stuck_out_tongue:

And yes, the attiny85 is clocked at 8Mhz in PlatformIO by default,

but can naturally be over-ridden, via the board_build.f_cpu platformio.ini parameter.

btw, apparently your Duemilanove should have worked still - it’s in the list on the tutorial page, with no change in pinout - is the code too big for it now? And it looks like it’s a 10uF cap - which they naturally don’t mention until the very end, and only show in the picture of the Mega… not confusing AT ALL! :man_facepalming:

The 10µF electrolytic capacitor connected to RESET and GND of the programming board is needed only for the boards that have an interface between the microcontroller and the computer’s USB, like Mega, Uno, Mini, Nano

https://www.arduino.cc/en/Tutorial/ArduinoISP

Oh, btw… it looks like you don’t need to define USE_OLD_STYLE_WIRING for the Uno - it’s there so you can use D11, D12 & D13 on the Mega, Leonardo, Due, etc … in other words, boards where the SPI is not the same pins as the Uno. :wink:

Aye, that makes sensem when you put it like that. I never twigged! Thanks.

Not a major problem, normally I burn an 8MHz “bootloader” (aks fuses) before I use them. This one was brand new.

I thought so too. It worked with the 1.8.5 IDE, but I’ve just updated to 1.8.13, maybe something changed I’ll check again.

I’ve never needed any capacitors on the Uno/Duemilanove, ever! Lucky me.

Interesting, when I used the 6 pin ICSP connector, it didn’t work. Only when I cganged it and used the GPIO pins. Again, I’ll have another check later.

Cheers,
Norm.

1 Like

Further testing.

#define USE_OLD_STYLE_WIRING makes no difference on the Uno. As you suspected.

Duemilanove now works, took three attempts (in the Arduon IDE first) to get it to actually work. Fused for 8 MHz now as well.

Uno/Duemilanove do not work when using the 6 pin header. Gives errors about the device not being connected. Switch to using the D10-D13 pins, works fine. Duemilanove not withstanding of course.

Cheers,
Norm.

That would be because the ISP header brings out five of the six pins you need for ArduinoISP - MOSI, MISO & SCK (i.e. D11, D12 & D13), VCC and GND… and the sixth pin is the RST pin, not D10. The ISP header is perfect for the target device, since it is the programming header, but not for use as a programmer.

Nice. Thanks for that. RST, silly me!

Cheers,
Norm.

1 Like